


Arknights Contingency Contracts #10 Easy Clear Guide
2023-02-07
With the 3 weeks Side Story Anniversary Celebration Event coming to an end in Arknights, A brand new challenging event emerges in order to give the players a much needed challenge in the game with enticing rewards and difficult enemies to test your teams against. The event is that of Contingency Contracts #10 - Ashring with many different mechanics and one of the most oppressing challenging stages in the game.
In this guide, we will go over the details and mechanics of the main stage of Contingency Contract #10, the details regarding the enemies players will need to face and the best operators to deal with each type of enemies and an easy way to clear the permanent map of the event.
Contents:
- Contingency Contract #10 Main Stage and Enemies
- Contingency Contracts #10 Easy Guide
- LDPlayer 9.0 - The Perfect Engine to Experience Arknights
Let’s play Arknights on PC and find out together.
Contingency Contract #10 Main Stage and Enemies
Contingency Contract #10 - Ashring Main Stage features enemies, mechanics and boss from the main story chapter 10 with an emphasis on a special mechanic with the special barrage meter which fills up and deals massive amounts of damage to operators in a wide area.
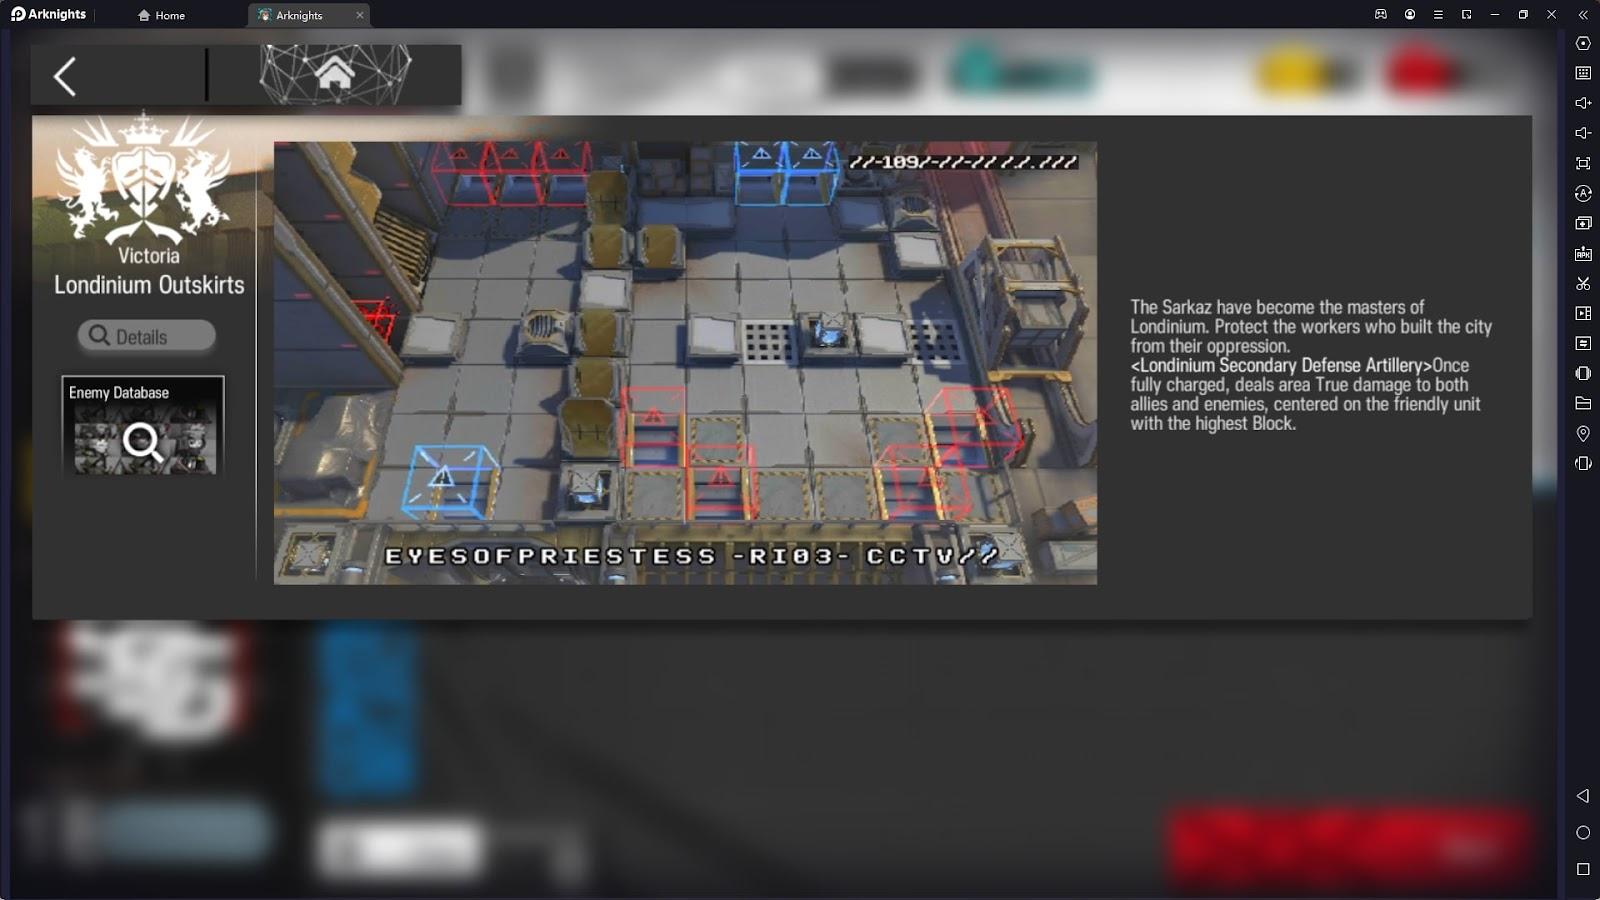
Map
The permanent map for Contingency #10 features 2 different sides with 3 different exits for enemies to get out of the map, with 1 side dealing with an easier swarm of enemies while the other deals with various dangerous enemies and the stage’s main boss. In addition, an aerial area is also in the map, deploying aerial based enemies on the stage.
Enemies and Mechanics
- Londinium Secondary Defense Artillery: The main mechanic and main threat of the map and have the capability to wipe out an entire squad of different operators (and enemies). The cannon will gradually fill up over time during the fight and will fire a round of damage to the operator with the highest block count (if the same block count, it will target the one with the highest HP), dealing 3000 true damage to the target and the enemies/ allies within a big area. This means that if your ally does not have over 3000 HP at the time of the cannon fire, your operators will immediately be obliterated, so pay close attention to this. However, the canon can also be used to your advantage to deal damage to your enemies.
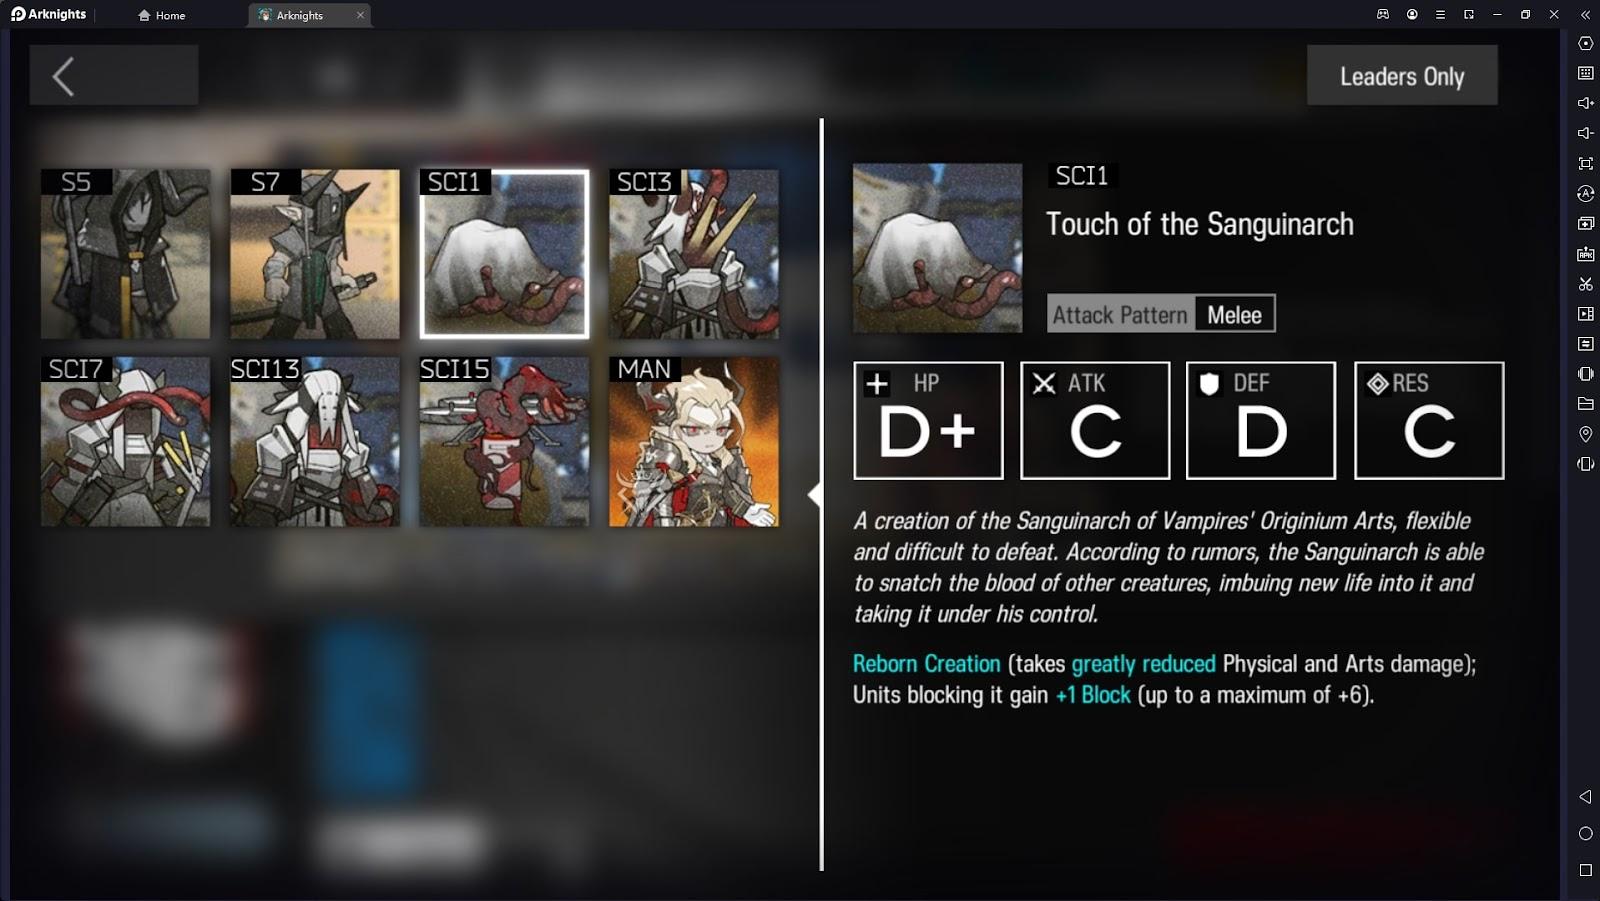
- Touch of the Sanguinarch: the mobs of this Contingency Map, these critters have the ability to increases the block count of different operators when blocking them, making them the prime target for the Londinium Secondary Defense Artillery fire, so players should pay attention and adjust the block count for the operator accordingly by killing them at opportune times.
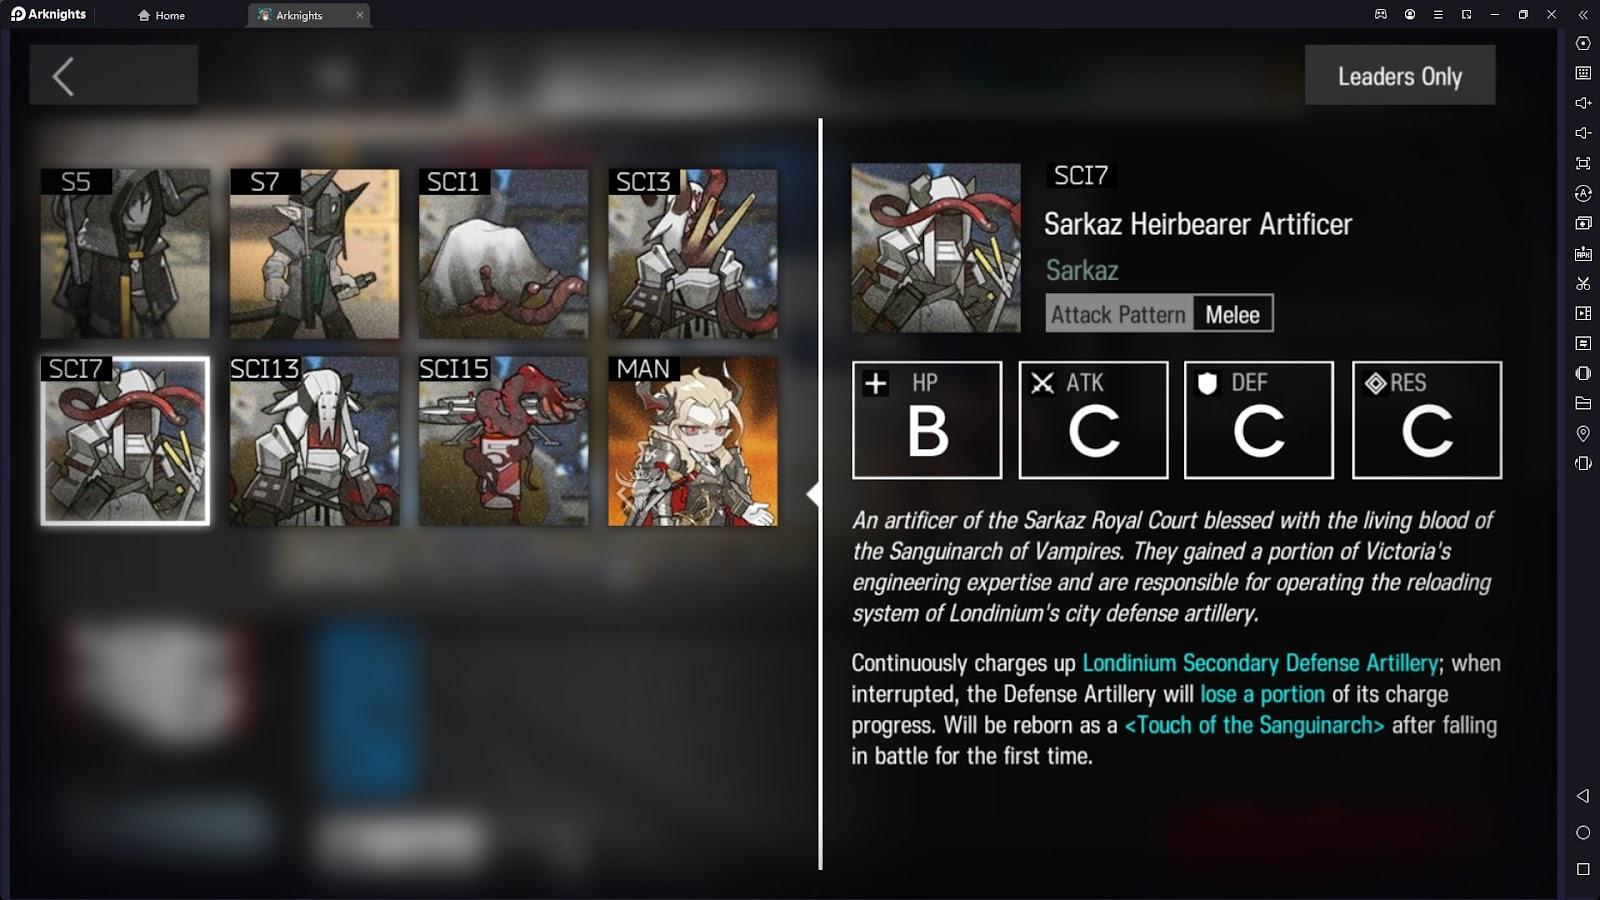
- Sarkaz Heirbearer Artificer: A type of enemy that is capable of charging up the canons faster when they first enter the map, making the cannons fire faster and dealing more damage in a short amount of time. Will turn into a Gift of the Sanguinarch when killed.
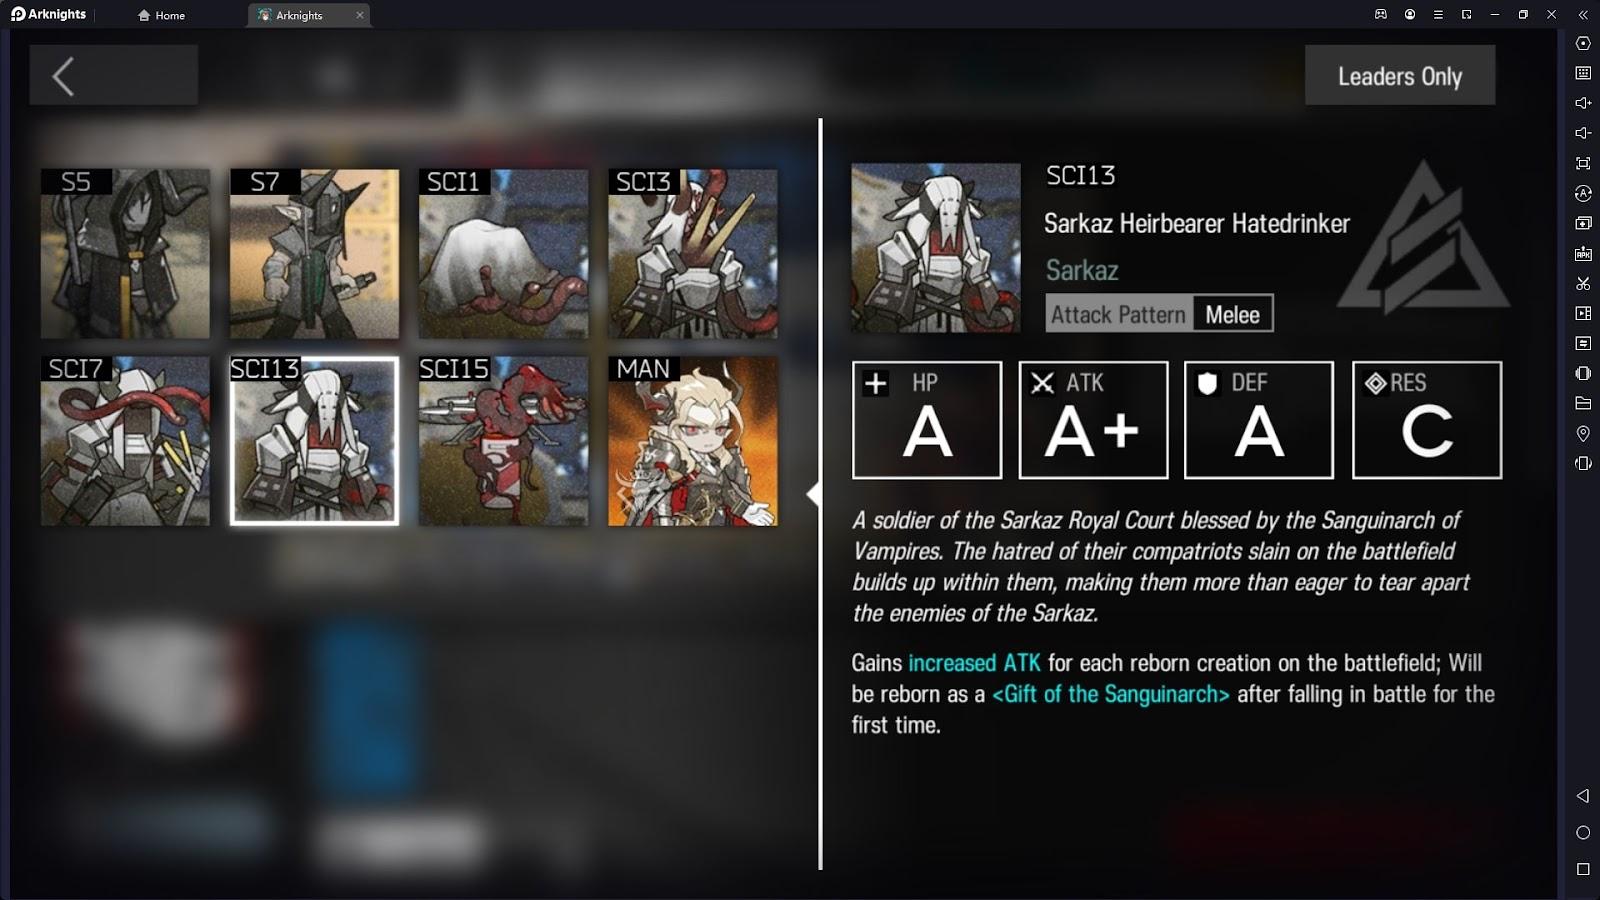
- Sarkaz Heirbearer Hate Drinker: A type of threatening enemy that will gain an enormous amount of attack proportional to each reborn creature on the field, making them a big threat to your defender and melee operators. Will turn into a Gift of the Sanguinarch when killed.
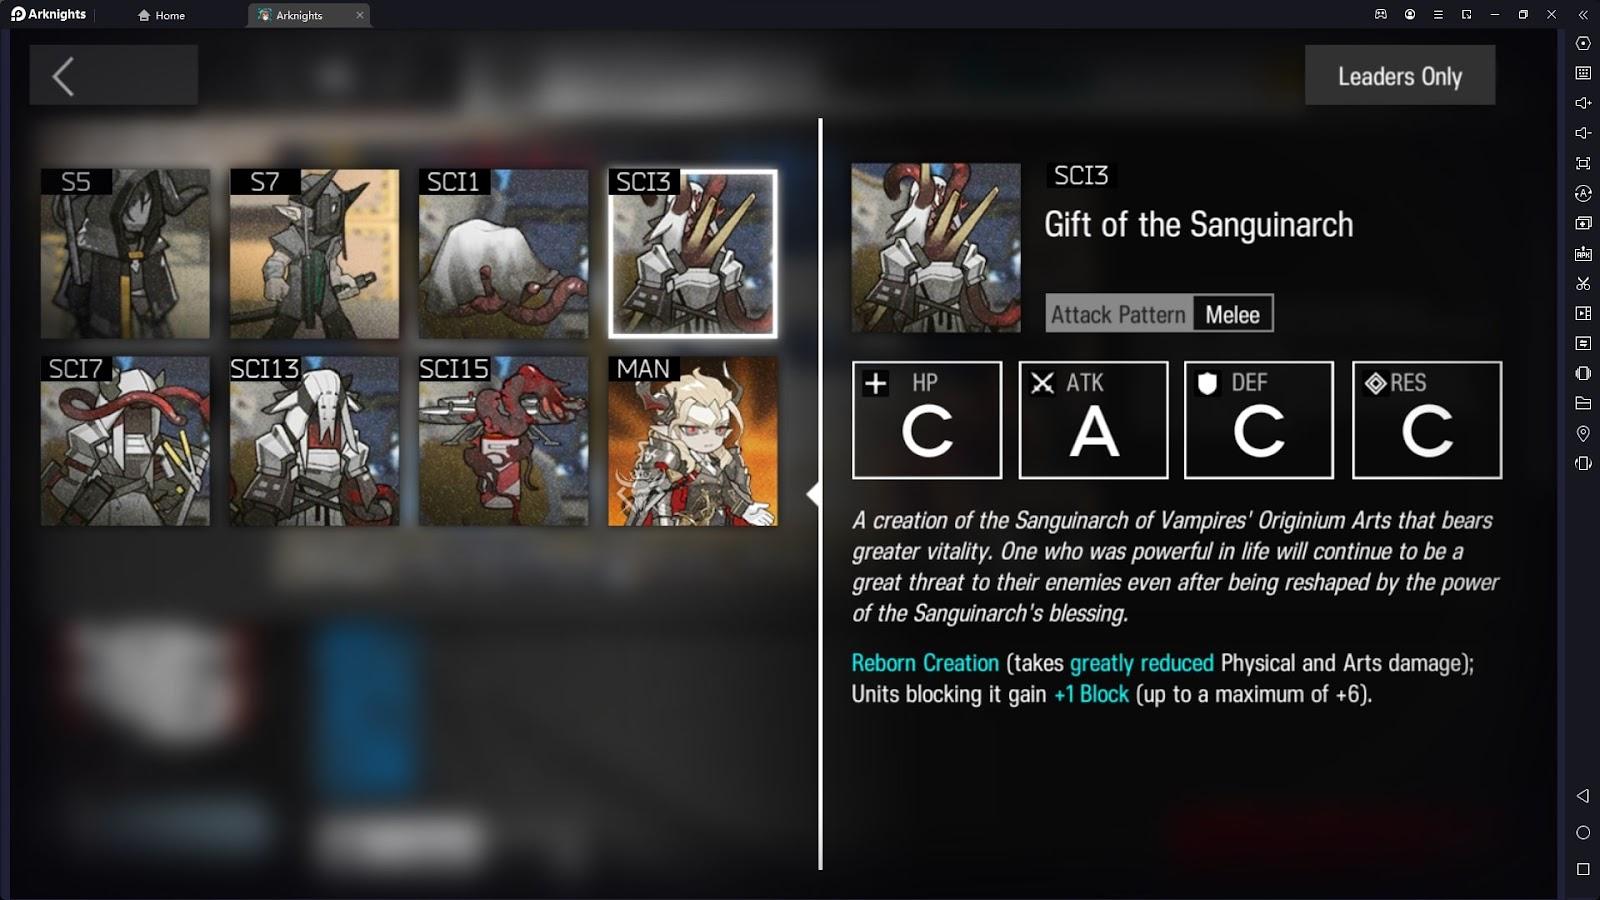
- Gift of the Sanguinarch: The upgraded version of Touch of the Sanguinarch and functions practically the same as the critters, these enemies have higher HP, is harder to kill due to taking reduced damage and should be dealt with impromptu in order to avoid overwhelming damage from too many enemies.
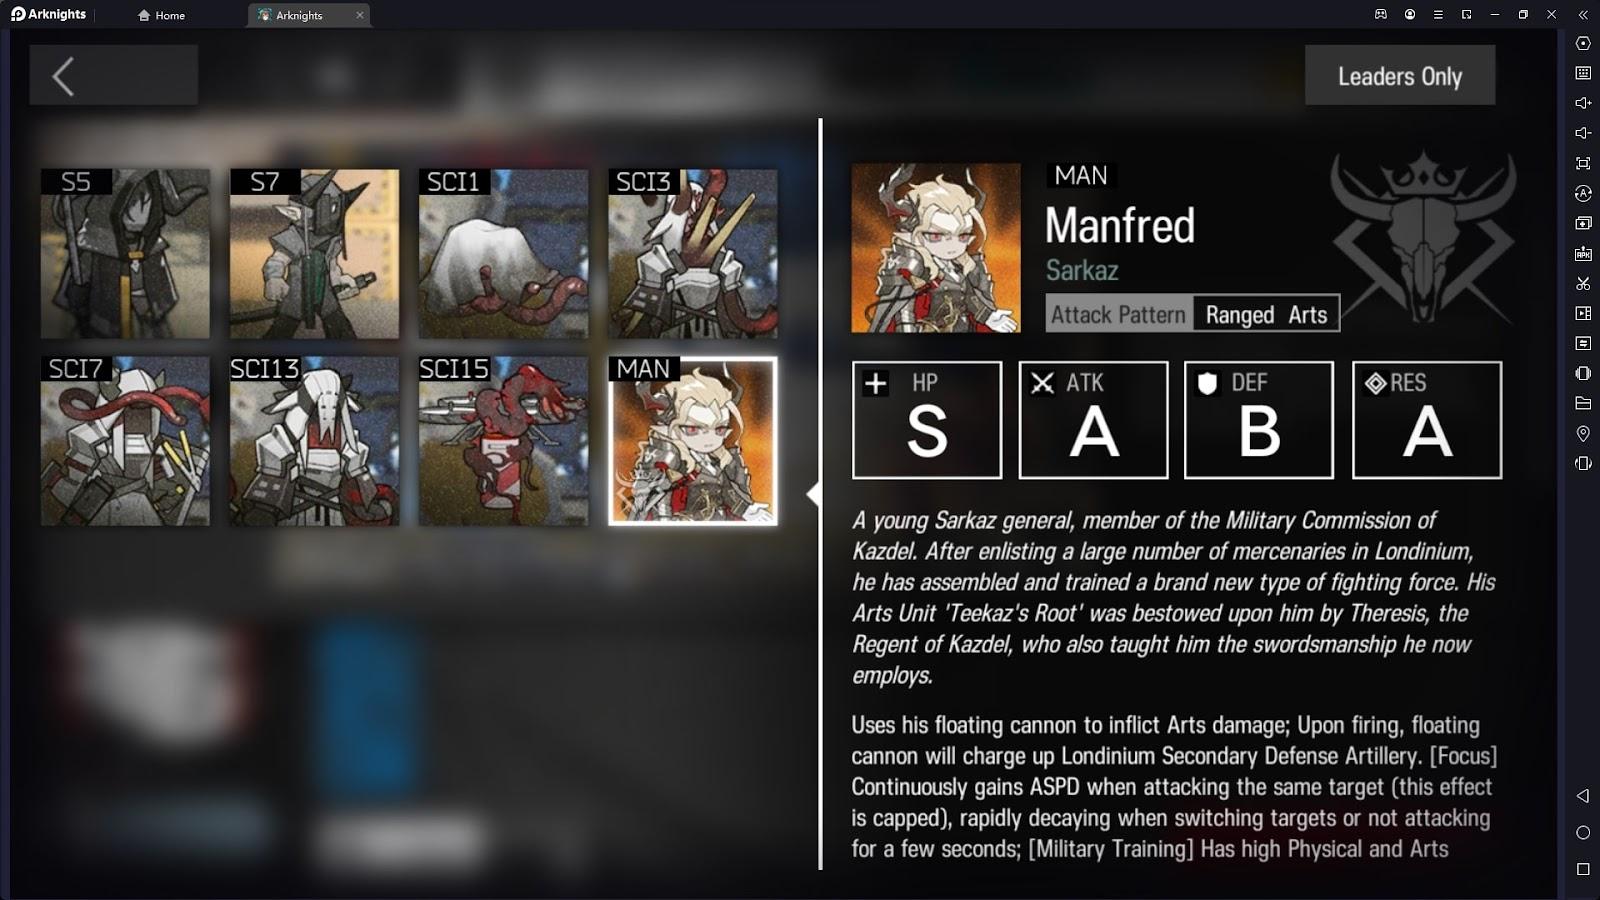
- Manfred: The main boss of this map, he is a dangerous foe to face off against as he deals massive amounts of arts damage overtime with stacking Attack speed as long as he targets the same ally over and over again and has enhanced physical and arts damage reduction. However, he will become weak when he is hit by the shot from the cannons, reducing his defense and stunning him for a short period of time. Therefore, it is important to use the cannons to your advantage against him, otherwise, it will be difficult to kill him over a long period of time.
Contingency Contracts #10 Easy Clear Guide
The permanent map for Contingency Contracts #10 can easily be cleared with a combination of 5 core elements and operators, allowing players to use the cannons to their advantage to deal damage to enemies and clear the stage easier.
The operators required to clear this stage includes:
2 Lane Holders Operators:
The first thing that needs to be taken care of is the 2 lane holders, if you don’t have 2 operators capable of dealing with the enemies quickly for the 2 specific lanes in the map, then you won't be able to clear the map easily. However you can use several different operators for this role in order to fulfill this requirement:
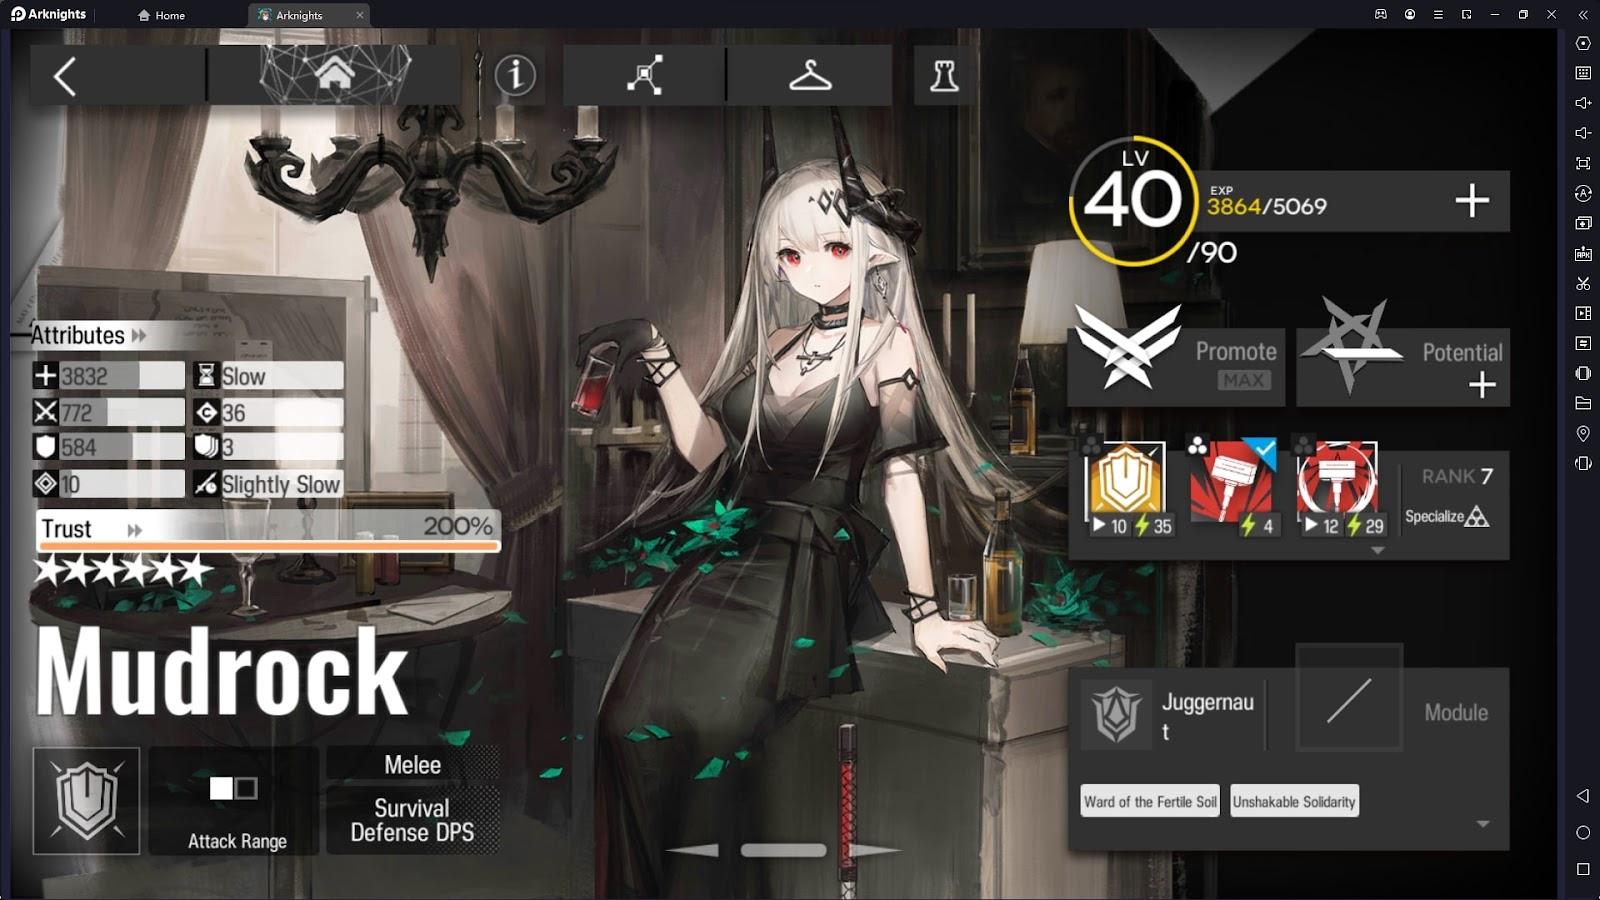
- The first position is the left side of the stage, which requires a good defender or block 3 operator that can hold a lane and deal damage to enemies to free up that lane as fast as possible. The best candidate for this position is Mudrock, alternatives includes Blaze, and other 3 block defenders
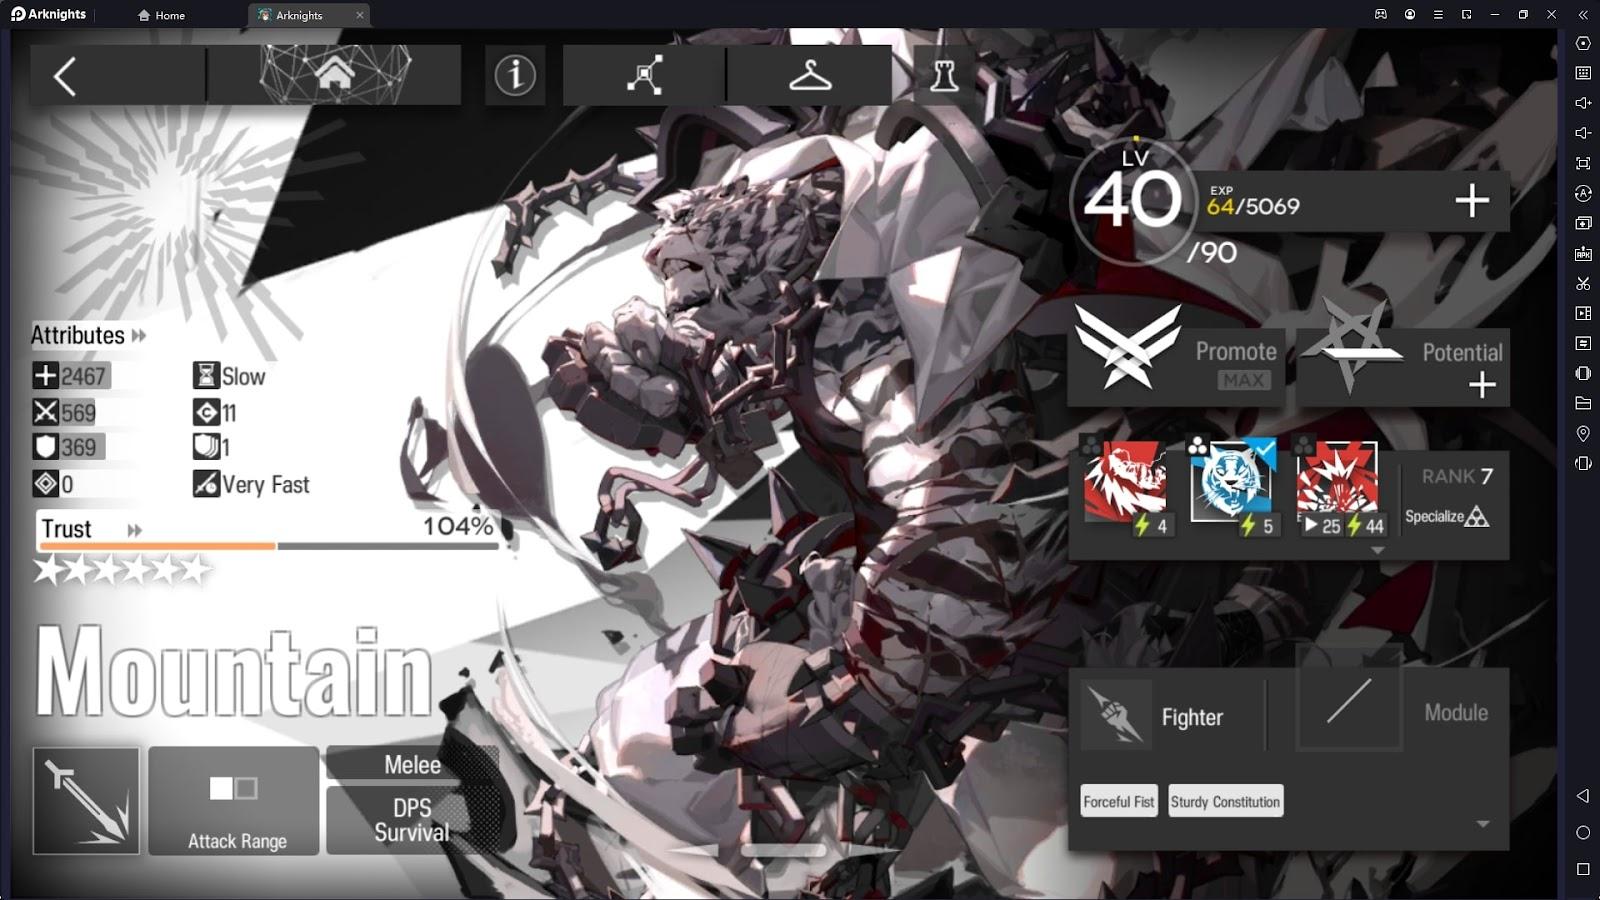
- The Second is the camouflaged title on the right, that the operator needs to be able to quickly deal with the enemies otherwise, they will leak and go through the defense line. The prime candidate for this position is Mountain, alternatives include Thorns or Silverash.
2 Medics:
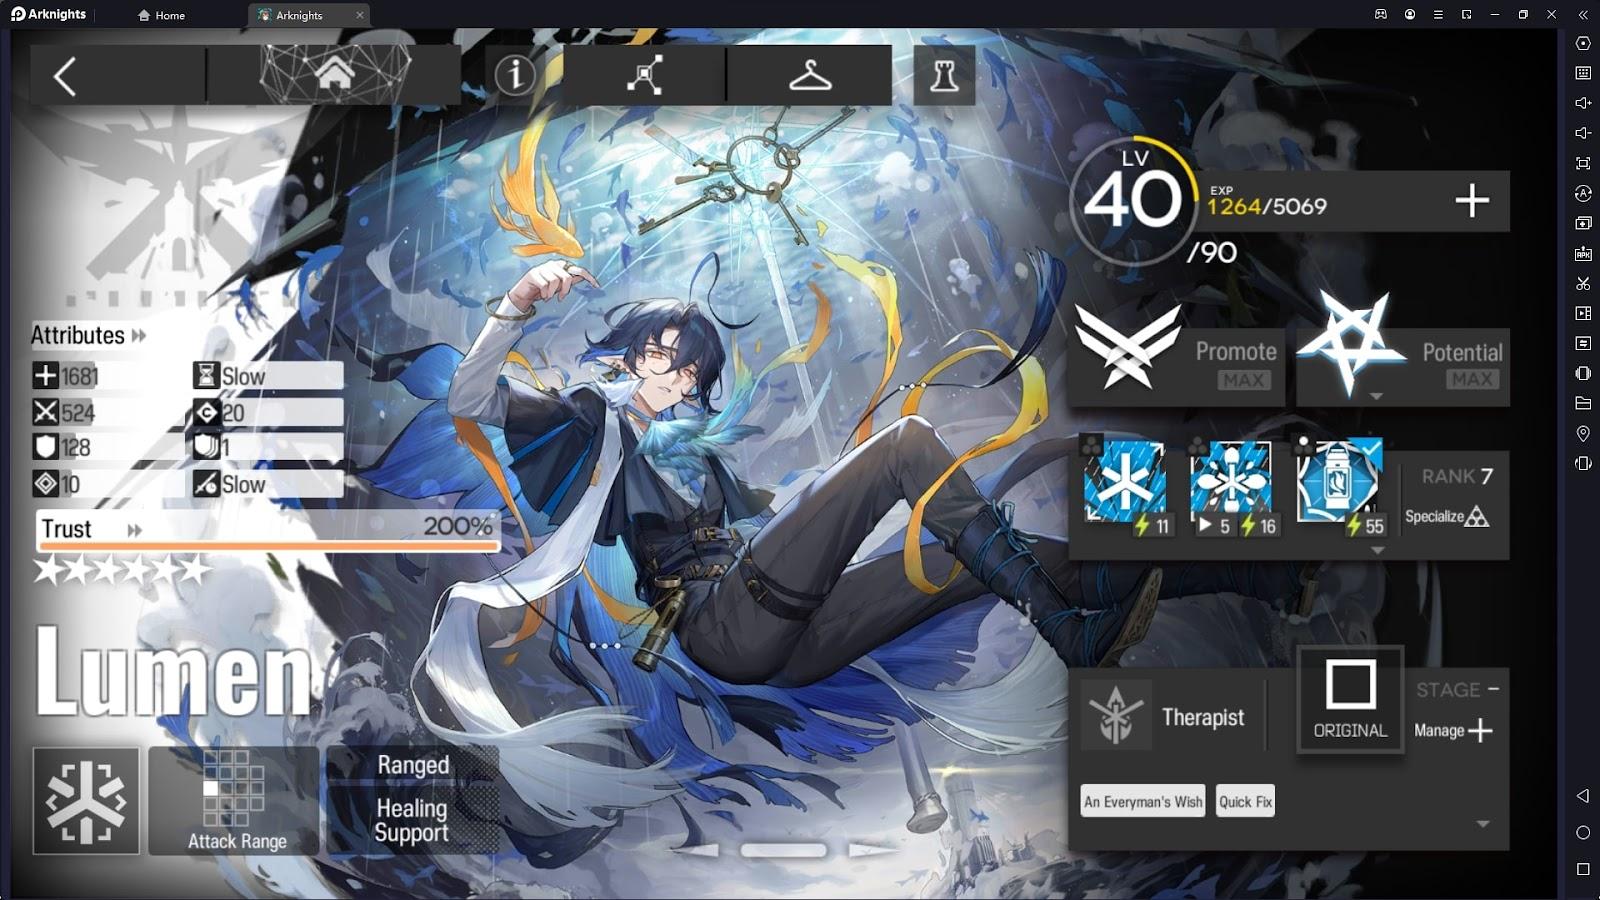
In this strategy, the medics are extremely crucial and they must be fully built and be able to heal as fast as possible in order to keep our main tank - the defender alive throughout the cannon’s barrages. The best candidates for these roles are: Shining, Warfarin and Lumen, other medics also work but they need to ensure that the defender is alive at all time above 3000 HP in order to tank the cannons.
The Defender:
The crux of this strategy and the one that needs to tank everything and survive, this role needs to be handled by a high HP, high Defense Defender in order to bait the enemies’ and cannons’ attacks to deal with all the enemies at the same time.
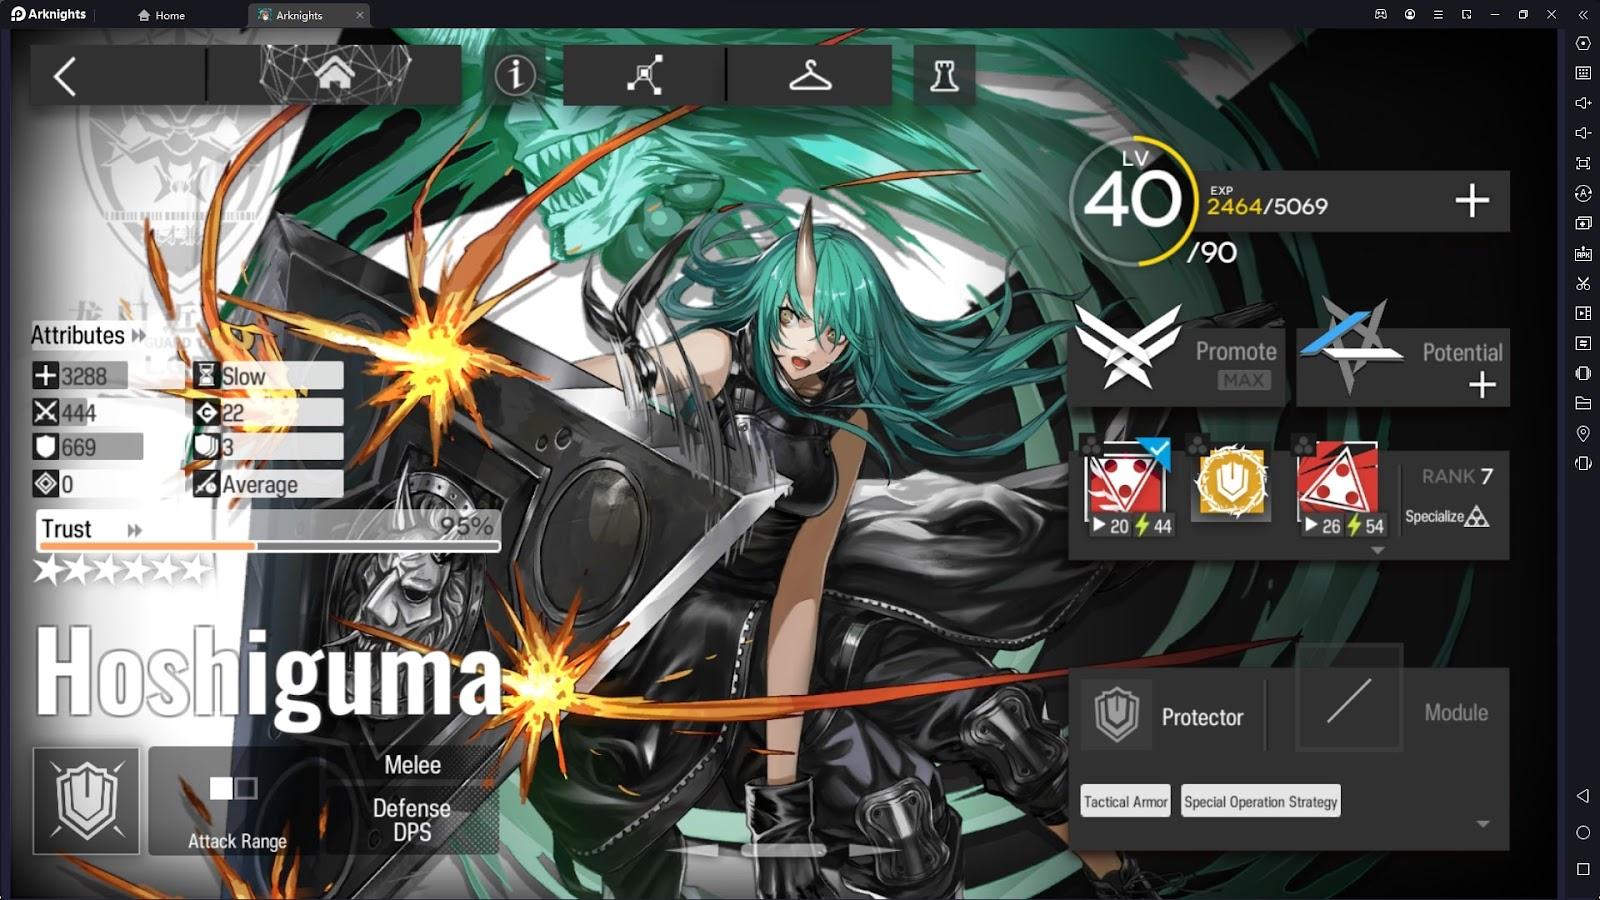
The best candidate for this role is a fully built Hoshiguma, who has all the requirements and then some for this role, with some other qualified defenders including Nian.
The Strategy:
The way of doing this stage is by positioning the operators in the following numbers on the corresponding numbered titles as following:
- Laneholder 1 : 1
- Laneholder 2: 2
- Medic 1: 3
- Medic 2: 4
- Defender : 5
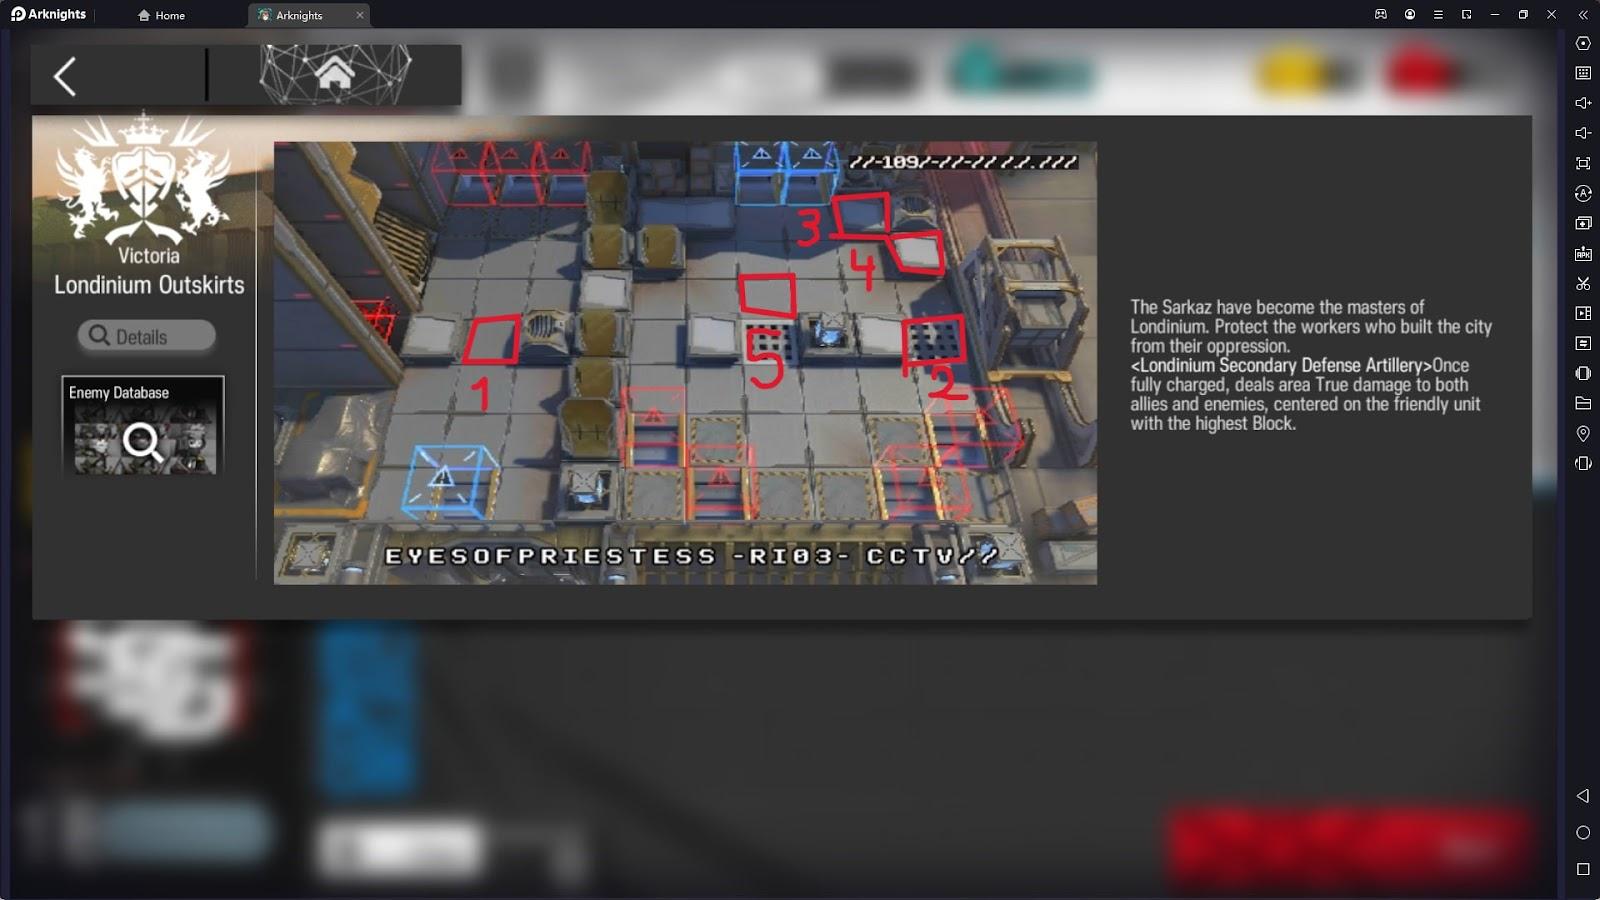
The main thing about this stage is to stall the enemies with the defender and let the cannon fires do the rest, helping to deal massive amounts of damage to the enemies and stunning them, allowing time for the medics to heal up the defender and repeat.
Some Important Considerations
- DO NOT take HP down Risks for the map, this will make it hard for the defender to be able to tank the cannons’ shots and survive.
- For Landholders, they need to be able to clear out the enemies from their respective lines and survive long enough to clear the enemies so that the cannons will focus mainly on the Defender.
- For Medics, they need to be able to fully heal the defender to full health after they have been hit by the cannon and tanking enemies’ damage.
- Players can take a large number of stat buffing risks for this map as long as they can ensure the survivability in the long term for the main defender.
LDPlayer 9.0 - The Perfect Engine to Experience Arknights
Recently introduced, LDPlayer 9.0 not only allows players to easily download and play Arknights on PC, it is also designed and specialized so that players can have the best experience playing Arknights on the highest FPS and highest graphics.
Furthermore, with LDPlayer’s keyboard-mapping function, players can clear Arknights stages more effectively using only keyboard buttons, allowing players to be able to do the most famous Arknights trick - the Pause deployment trick, making the stages faster and easier to play and clear than when playing on mobile.


What's New
A Beginner's Guide to Jutsu Abyss Chakra Unleashed with Tips and Full Gameplay Walkthrough
Find Kids with Dadish 3D Tips and Tricks - Ultimate Beginner's Guide
Sushi for Robots Beginner Guide - Craving the Sushi Taste with Best Tips
Cat Garden - Food Party Beginner's Guide with Tips – Party Starts Here
If you're intrigued by this game and eager to dive in, simply click the button below to start playing this game online right in your browser!