


In patch 1.4, Mane’s Bulletin is introduced to Reverse 1999 as a new game mode and endgame content, which is basically what players call a “raid”. This article serves as a basic guide to get you started tackling these extremely challenging bosses.
WHAT IS IT?
Every patch from 1.4 onwards, you will face three different bosses as raid trials. Each of these have three difficulties, two of which are simple, to give you an idea of the boss’s mechanics. The fun begins with the final crisis difficulty. Here, you need to form a team of 4 units, deal as much damage as possible in a total of 30 turns, against a boss with infinite health bars and gets stronger with each bar depleted. To get all high scores rewards at rank SSS, you will need to achieve a score of 850,000. There’s also accumulative scores rewards that you can get easily by putting the stage on auto multiple times. In patches 1.4 and 1.5, achieving rank A+ at 360,000 score would be enough for getting all the valuables, as higher ranks only give a small amount of psychube currency. Post patch 1.6 however, raid rewards change to become a shop system with more valuable goods, which means achieving SSS becomes much more important. Any decent limbo team would be enough to get you to A+, provided that you play into the bosses’ mechanics. If you are aiming for SSS though, only a fully invested team of specific units could get you there.
HOW TO BEAT IT?
Before I go over each of the crisis difficulty for the three bosses in 1.4, there is some basic knowledge about crisis difficulties in general you will need to know.
Only dmg dealt to the bosses counts toward the total score. If a boss has minions, normally you wouldn’t want to spend too much AP on them. The boss will destroy its minions and recreate new ones at the beginning of each health bar. The bosses do not have moxie, instead they use [eureka] as ultimate resource. You will have 4 turns to empty each health bar before the boss casts ultimate. Getting hit by an ultimate is basically game-over. To make things worse, they are also immune to control.
The first three health bars of the boss you face are actually different entities, each being summoned after the previous dies, and has better hp, atk, def stats as well as better passives. However, starting from the fourth health bar, the boss becomes red and immortal, and only gain 20% dmg bonus and 20% dmg taken reduction every time it revives. Reflected on your actual experience, excess damage dealt to the boss will be lost for the first three health bars, but from the fourth onwards it will be dealt to the next bar. The same also applies for buffs and debuffs. As you will most likely shred through the first three health bars with ease, Everything I write about the bosses below, especially passives, will be referring to their fourth and final form.
Most teams can achieve a score of A+ pretty easily, and many teams can achieve SSS through hyper investment. Discussing those cases would be a waste of time and energy for most players. Therefore, all team builds and tactics I propose would be assuming you are aiming for S-SSS with a team of insight 3 level 30+ resonance 10 with level 60 psychubes. All “units” mentioned refer to your characters. Effect names might not be accurate due to this article being written prior to global patch 1.4 release, and no official translation is available.
Darkness of the Abyss
This stage consists of Darkness of the Abyss (the boss, mineral, reality) and two Tentacles of the Abyss (mineral, reality).
• [frostbite]: Becomes [freeze] after accumulating 5 stacks. [tough defense I]: dmg taken reduction +25% for one attack, cannot be dispelled.
• Star afflatus units gain 20% stats increase in atk, def and hp. Units cleanse [frostbite] on self and gain 30% atk stats increase for 2 turns after taking 2 actions in one turn. Units inflicted with [freeze] lose 60% max hp at turn end.
• The boss takes 75% more genesis dmg. It self-cleanses all [stats down] at end of turn. If it didn’t take damage in one turn, it will gain 2 layers of [tough defense I]. Every other turn, the boss will aim at 2 units with the highest hp percentages and inflict 4 layers of [frostbite]. Its ultimate will inflict [freeze] on your whole team.
• The tentacles will attack the unit with the highest hp percentage at turn start (changes to turn end in patch 1.5), and give 1 layer of [tough defense I] to self and the boss. If at 4 moxie, they will cast ultimate and inflict [freeze] on the target instead. When a tentacle is killed by your attacks, the boss will take genesis dmg equal to 15% max hp.
Team composition: The obvious best carry would be 37, as this boss is tailored for her with the genesis fragility. She is the only one with which you can secure SSS with reasonable investment. While SSS seems out of reach without 37, other star afflatus carries, especially Charlie, are enough for SS. Lilya is a good choice as sub carry here due to her frequent follow up attacks securing that 30% atk bonus. For supports, Voyager and 6 are both solid choices, one with genesis dmg from counter and the other with handy cleanse to deal with all that [frostbite], and both increase survivability. The only good choice for healer would obviously be Tooth Fairy, her cleanse on ultimate useful as always. If you do not have enough star units for a complete team, just use any decent unit you would use for limbo, but preferably not those that benefit from afk, as you will need to move frequently to get rid of the constant application of [frostbite].
Stage strategy: The first priority would be to survive. Never be greedy and risk getting frozen unless you have cleanse at hand. Prioritize damage dealers, triggering the stage cleanse mechanic by moving twice per turn. Use tuning to make sure you have enough skills to use. For supports and healers, either use cleanse skills if you have them, or move twice before getting frozen. Aim only at the boss with your skills until you arrive around the S rank threshold. At this point most skills do next to no damage to the boss, so just keep skills with genesis dmg targeting the boss, and use the rest to kill the tentacles, dealing 15% max hp dmg to the boss for each tentacle killed.
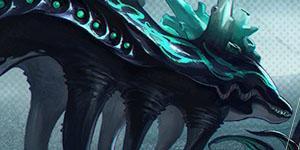
Marsh Creation
This stage consists of only the boss, The Guiding One’s Creation (beast, reality).
• [stronghold IV]: dmg taken reduction +100% from reality dmg for one turn. [contempt IV]: dmg taken reduction +100% from mental dmg for one turn.
• Mineral and beast afflatus units gain 20% stats increase in atk, def and hp. Dispel enemy [stats up] [pos status] after using a tier 2/3 buff/counter/health/channel skill.
• The boss gains counter every other turn, inflicting [corrode] when attacked, making the attacker lose 15% max hp at turn end. It gains a random 2 turns buff every turn. It takes 40% less dmg when in counter, and deals 20% more dmg to units without shield or counter. One of the boss’s skills deals more dmg to units without at least 4 types of buffs. The other skill gives the boss 3 turns of [stronghold IV], and if it already has that, 3 turns of [contempt IV]. Its ultimate will dispel all your buffs and reduce all your skills to tier 1.
Team composition: Due to this being a single target stage, ST carries of mineral and beast would obviously work best. What’s not obvious is that the boss has relatively low mental def, and its skill’s buff application order also favors mental dmg. Therefore, Melania and Kaalaa Baunna are ideal damage dealers for this stage. Pickles is the best choice as sub carry here due to the frequent need for dispel. If you do not have him, Horropedia or X could serve as niche substitutes (Necrologist cannot dispel counter). For supports, 6, An-an Lee, Voyager, Sonetto, anyone with buff application is welcomed, as the boss hits so much harder if you don’t have abundant buffs. Healers follow the same rule, with Medicine Pocket standing out for their [sturdiness] application. Ms. NewBabel can also be considered because shields means free dmg taken reduction here. If you do not have the units above, use whoever you have raised, as long as they can counter the boss’s mechanics.
Stage strategy: The basic flow for this stage is simple. Buff, dispel, attack, repeat. If you do not have any means to dispel the boss’s counter, use the turn when it has counter to buff up, merge high tier skills for the stage dispel mechanic, heal, and prepare for the burst next turn. High tier buff skills are especially important here due to how the boss operates. Furthermore, take constant note of what buffs the boss has, especially if you are using a reality carry for whatever reason. It’s unlikely for [contempt IV] to appear if you acted smart and dispelled frequently enough. However, [stronghold IV] will be there quite often, so make sure to get rid of that before using reality dmg skills to attack.
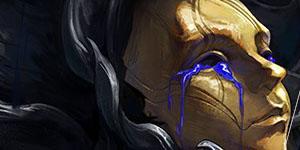
Gold in the Cave
This stage consists of Gold in the Cave (the boss, spirit, mental) and two Manus Vindictae disciples, a Concierge (beast, reality) and an Etiquette (star, mental).
• [havoc]: penetration rate +5%. [malevolence]: dmg bonus +5%. [obstinate]: dmg taken reduction +5%. [enervate]: incantation might -10%, removed after casting ultimate.
• Units gain 1 layer of [enervate] at turn end. After casting an ultimate, all allies gain 30% dmg bonus, and the ally with the lowest hp percentage heals 10% max hp. If any enemy is under control or at least 2 other debuffs, all allies gain 1 moxie and 20% dmg heal for 2 turns.
• The boss gains 30% dmg bonus if not inflicted with at least 3 types of debuffs, and 30% penetration rate if not inflicted with at least 4 types of debuffs. It takes 30% more dmg from ultimates, and loses all buffs before getting hit by one. The boss will inflict [disarm] on the unit with highest atk every other round with one of its skills, lengthening the effect if one of its buffs reaches 5 layers. Its other skill attacks 2 units with the highest hp percentage and gives 3 layers of [havoc] to self, which changes to 5 layers if not inflicted with at least 4 types of debuffs. Its ultimate will cleanse all its debuff, dispel all your buff, and inflict [disarm] and [silence] on your whole team for 2 turns.
• The Manus Vindictae disciples target the unit with the highest hp percentage. They take 15% more dmg from AoE attacks, and heal your unit with the highest atk for 15% max hp when defeated by your attacks. They will buff the boss with their skills, the Concierge giving [malevolence] and the Etiquette giving [obstinate]. Their untimates only take 3 moxie to use and buffs all the enemies.
Team composition: It’s obvious that this stage leans heavily into casting ultimates. Moxie gain is no longer an issue so long as you inflict enough debuffs on the enemies. For carry, 6 would be the best choice, as he has afflatus advantage, numerous debuffs, and an ultimate that can reach 1000% multiplier on a single target. Melania and Kaalaa Baunaa are also great choices. A Knight does a good job as sub carry here due to him easily killing the boss’s minions with his ultimate and granting buff to the whole team. For supports, Bkornblume and Shamane are solid choices, both having handy debuffs and an ultimate with good damage. Necrologist, surprisingly, is very decent for healing on this stage due to being able to use her ultimate frequently, and the huge dmg bonus buff that accompanies it is not to be ignored. If you do not have the units above, just use whoever you have raised that has abundant debuffs or a high damaging ultimate. You can also cheat this stage with a double moxie generation Necrologist team in light of how the enemies choose their targets, but I will leave that for you to discover.
Stage strategy: The goal here is simple, use 4 ultimates in one turn. The stacked dmg bonus from casting ultimates will make them hit like a truck. During the other turns, try to keep 4 types of debuffs on the boss at all times. This will grant you extra moxie, extra damage, and extra survivability. Aside from that, use AoE skills to kill its minions before they get to use their ultimates. Those disciples gain ultimate faster than the boss, and if they manage to use an ultimate, you will be under great pressure to heal up, which will hinder your moxie generation plans.
That is all for Mane’s Bulletin in patch 1.4. Here’s a reminder that these stages take a long time to complete, so take a break and get back to it another time whenever you find it too overwhelming. Good luck and have fun.
#Reverse1999 #Reverse1999Guide