

 Download League of Legends: Wild Rift on PC
News and Guides for League of Legends: Wild Rift
Download League of Legends: Wild Rift on PC
News and Guides for League of Legends: Wild Rift
League of Legends Wild Rift Blitzcrank Build Guide, Blitzcrank Skill Combo and More!
2021-04-19
Blitzcrank is perhaps one of the most iconic supports in Wild Rift. Due to his signature hook ability, he can make tons of plays around the map that can completely turn the tides of any team fight whether in the early, mid or late game. Since he’s skill-shot reliant, he has a huge skill curve and can be played in various positions adding to his complexity.
Content:
Today, we’re going to be talking about everything you need to know about the champion including an overview of his skills, how to efficiently play him and what skill build you should opt for in most cases.

Overview:
As mentioned prior, Blitzcrank is an extremely skill-based hero. However, he is also extremely fun to play and can be quite volatile in fights due to his near limitless potential in terms of hooks. For support like Blitzcrank, having plenty of vision around the map alongside good map control is of pivotal awareness. In order to land good hooks, you’ll need to know exactly where your opponents are at all points of the game. A lack of vision can completely reduce Blitzcrank down to his elements which is one of his downsides.
You can play the champion as a tank and as a support as well. Due to his ability to stun and knock up enemies, he is most often played in the Baron lane. However, the meta can often change his position. If you haven’t already, you can check the hero out and play him yourself by downloading Wild Rift for free on PC.
Tier List:
Just like our previous Zed Guide, placing Blitzcrank in a Tier List proves to be significantly difficult as most of his kit relies on how good the user is with his skill shots. While there are other supports and laners who are more reliable in nature and can thus deal more impact against most Blitzcranks, if you do end up focusing on the champion’s skill shots, we can comfortably place him in the A tier.
Do note that the sky is the limit with this champion. So, he can easily go up to the S tier and even further beyond if there are particularly squishy champions on the enemy side. While he isn’t an assassin, he does prefer playing against teams that are squishier in nature.
Stats:
If you’ve been playing Wild Rift, you’ll know that stats are perhaps the most important of any champion in Wild Rift. For supports like Blitzcrank, understanding their strengths and weakness in terms of how much HP they have, their mana pool, movement speed, basic attack damage can help you take into account what particular skills you need to use and playstyle you must adapt to make the most out of the champion.

Do note that the developers have spent tons of time in order to balance the champion as much as they can. Therefore, where the champion might lack in a particular stat, he’ll make up for it in some other manner. As expected, while Blitzcrank does not have a lot of right-click damage, he has high HP and deals a lot of magic damage in the forms of his spells alongside his great CC.
Before we let you know of his stats, there’s a small rating system we’ve devised that you can take advantage of to completely understand what metrics are most important when judging a champion. In this regard, the damage is usually correlated with right-click / basic attack damage or spell damage in the case of a Mid Laner.
For toughness, HP and armor are taken into regard. The harder it is to kill a champion, the tougher they are. The utility is the amount of CC (Crowd Control) a particular champion has. This CC can be in the form of knockdowns, stuns and general AoE tick damage. Lastly, Difficulty is quite self-explanatory. Before you start off practicing on a champion, we recommend taking a look at their difficulty so that you get an idea of how many games you will need to invest in practicing the champion’s skill sets. Moreover, a champion with higher difficulty is not recommended for new players.
Here’s a complete overview of Blitzcrank’s stats:
- Damage: Weak
- Toughness: Average
- Utility: Medium
- Difficulty: Hard
HP:
Since Blitzcrank is a support that can also be played as a Tank, you can expect him to have high HP and have good regen as well.
- Level 1: 650
- Level 15: 2260
- Per Level: 115
Mana:
Blitzcrank’s main damage output comes out from his spells. However, most of his spells do not require a lot of mana as they have low mana costs. As such, his mana gain per level isn’t very significant.
- Level 1: 345
- Level 15: 919
- Per Level: 41
Attack Damage:
Attack Damage is your basic attack damage. Since you are played as a support or a tank, you don’t have good damage gain. However, you won’t be basic attacking anyone for the majority of the game anyways.
- Level 1: 58
- Level 15: 82
- Per Level: 1.71
Ability Power:
Ability Power is how powerful your spells get over time. Since you are not considered as a caster but rather a disabler, you have the same Ability power for all your levels which is natural for a support hero.
- Level 1: 0
- Level 15: 0
- Per Level: 0
Armor:
Armor is your primary defense from basic attacks. In essence, the higher the amount of armor you have, the lower the amount of HP you lose per basic attack hit. As such, a tan like Blitzcrank has good physical damage resistance.
- Level 1: 52
- Level 15: 124
- Per Level: 5.14
Magic Resistance:
Quite self-explanatory. Magic Resistance is your ability to withstand spell damage. For tanks like Blitzcrank, you are going to have a naturally high Magical Resistance alongside your ability to increase it even further with the items you purchase...
- Level 1: 43
- Level 15: 66
- Per Level: 1.64
Attack Speed:
As tanky support, do not expect your Attack Speed to be high. Since you won’t be basic attacking anyone, this does not matter. However, it can be quite annoying when trying to last hit Minions in Baron Lane.
- Level 1: 0.8
- Level 15: 0.91
- Per Level: 0.008
Mana Regen:
Mana Regen is an integral part of support like Blitzcrank. Thankfully, he offers quite a balanced amount of mana regen which just barely lets him cast all his spells in a successive manner in the middle of a team fight.
- Level 1: 9
- Level 15: 21
- Per Level: 0.86
Move Speed:
Blitzcrank is not the fastest champion out there and his movement speed is a testament to that. If you really want to be agile, we recommend building items that add to your general dexterity.
Blitzcrank Rune Build:
Runes are used to supplement your champion’s abilities. We have two very different rune builds for your reading pleasure as the Champion can benefit from both of them in different situations. As mentioned earlier, his entire playstyle requires you to be landing your skill shots.
However, you landing your skill shots does not always mean that your team will be there to back you up. As such, we’ve included two different rune builds for very different situations. We’ll also be explaining the importance of each rune in great detail.
The Recommended Build:
After Blitzcrank has been recently nerfed, we recommend this rune set as it helps supports get much tankier and stay relevant in the late game. Since the champion is not known for his late-game prowess, this build can help alleviate some of those issues.
- Aftershock
- Weakness
- Loyalty
Snowball Oriented:
If you are extremely confident with your abilities, this is the build you should go for. However, do note that if you don’t end up snowballing, the Champion won’t be nearly as effective as you hope he would be. The last two runes you’ll be picking up don’t work well with his entire kit either.
Try picking this up when you are either playing with a very good team, are in a low elo or are just extremely good at Blitz.
- Aftershock
- Weakness
- Hunter Titan
Summoner’s Spells:
- Flash: The spell that gives mobility fewer champions a flicker of hope. It is great with champions like Blitz as it lets you weave in and out of battle in a much quicker manner.
- Ignite: Ignite is amazing for securing kills as it provides you with tons of damage when trying to finish off an enemy.
Rune Details:
Now that you have an idea of what the majority of Blitz players choose in terms of their runes when playing the champion, here’s an explanation of why you should be picking these runes up in particular.
Aftershock: Aftershock is an integral rune on the champion as it works really well with his overall kit. It adds a lot of damage as well as resistance every time you hook. Both his Rocket Grab and Power First abilities proc this rune whenever you use them.
Weakness: Slowing down or immobilizing an enemy can be extremely powerful on a champion like Blitz even for a short amount of time. Thankfully, the Weakness rune can do this for up to 5 seconds. This rune too goes very well with your kit especially when you stun or hook anyone as they end up taking more damage from your team.
If you end up hooking a squishy target and use this rune, there’s a high chance they will be evaporated before they can attack. Do note that this rune’s debuff lasts more than Zhonyas (Stasi.) So, if your opponent ends up procing it, you can still take them out quite easily.
Loyalty: Blitz is a champion that requires his teammates to deal with the bulk of his damage. As such, he usually does not roam around a lot. Therefore, the Loyalty rune is a perfect complement to his abilities.
Conditioning: Conditioning helps gives the champion some much-needed tanky stats. Since his stats have been nerfed recently especially his HP gain, he can be quite weak in the late game in terms of his overall HP. However, if you end up picking this rune and play a bit more offensively, you can more or less negate the nerf altogether.
Hunter Titan: Hunter titan too, helps you with tanking up. However, if you are not snowballing, this rune won’t be of much help. In those cases, we recommend considering Conditioning or Loyalty as they work better even when you are playing from the backhand.
Pathfinder: Pathfinder helps you with roaming by speeding you up whenever you are in the jungle, bushes or river which can be especially useful against some drafts whose champions are more elusive in nature.
Spirit Walker: Spirit Walker provides you with much-needed HP and also negates some of the slow that you end up getting whenever you cast Overdrive.
Blitzcrank Complete Item Build:
While the champion can be played both as a support and a tank, his overall utilities and items remain the same. Since your main goal is to roam around the map and to apply pressure around areas you feel like you can get kills on, having the ability to pick someone off with your hook is quite an integral part of the process.
However, more importantly, your item build can shape up the difference between you actually landing a hook, reeling someone in and then killing them or just flat out dying before a fight starts since you’d be caught out of position. As such, there are only a few items that we’d like to recommend as core items on Blitz as, without them, he seems to die a bit too early before he can pull off any meaningful impact in the game. We’ll be talking about all these items in detail too.
- Winter’s Approach
- Locket Enchant
- Zeke’s Converge
Zeke’s Convergence:
Description: Casting your ultimate surrounds you with a blizzard and ignites a nearby ally’s attacks for 10 seconds. Your blizzard slows enemies by 20% and your ally’s attacks burn for 30% bonus magic damage over 2 seconds. Prioritizes highest Attack Damage ally.
Explanation: The item synergizes quite well with your one kill, one hook potential. If you have both Aftershock and a Weakness, the item will do a lot more damage and will also help your allies as well making sure that you can secure kills. It also gives you more Mana that helps make your shield much stronger.
Winter’s Approach:
The item provides you with additional mana that goes up to a whopping 700. So, along with your Manflow band, you end up having a total of 300 + 700 + 450 mana. The passive shield you get from late-game items alone will be over 435 which is about 30% of your maximum mana. This will allow you to tank more damage even in the late game.
What Boots to Choose?
If the enemy has a lot of champions that deal magic damage, you should go for Mercury’s Treads as it's quite a good item against them.
However, if your enemy has tons of Physical Damage go for Ninja Tabi.
Glorious Enchant:
By using Glorious Enchant, your Aftershock alongside your ultimate, you end up having three abilities that produce shockwaves around you dealing a lot of bursts. With Zeke’s convergence, you add in another item that deals damage in a circle around him. So, anyone close to you will have to face a lot of damage.
Locket Enchant:
We recommend using this item if your enemies have a lot of assassins' threats or if your team is generally not doing well. The item is quite standard as a support in any case.
Protobelt Enchant:
The item is quite decent on Blitz and surprisingly works well with his hook. You can dash into enemies and then hook them helping you position well in a lot of places.
Protector’s Vow:
Protector’s Vow is an item that is mainly meant for supports and also helps you become tanky while also helping you engage as well.
Randuin’s Omen:
The item is great against champions that have a high attack speed, which is primarily almost every AD carry in the game. This is primarily because it helps reduce the attack speed of your enemies by about fifteen percent for about 1.5 seconds especially when they are struck by an attack.
Warmog’s Armor:
Warmog’s Armor is one of the best tank items in the game. It is especially useful in the late game as it provides you with passive healing and a lot of HP points which is useful against poke damage.
Thornmail:
Thornamil is a great additional site, for Blitz. It induces Grievous wounds and works well as it provides a lot of damage reduction. It is also wonderful against Attack Damage threats (most ADCS) and a draft that provides a lot of heal.
Adaptive Helm:
If there are enemies that deal a lot of magic damage, then you should go for the Adaptive Helm as it makes you quite tanky against stat-based champions and provides you with magic damage resistance as well.
Abyssal Mask:
Abyssal Mask too is great against threats who deal magic damage. They have a unique passive that goes quite well with his kit in general.
These items make the most sense for most champions. They can absolutely devastate your enemy as the meta starts changing. We’ll also be updating the guide as the meta changes to make sure the item build remains up to date. In order to play the Champion better, here’s what you can do to enable 120 FPS Gameplay on Wild Rift using LDPlayer.
Basic Skill Introduction:
Every champion in Wild Rift has particular skills and abilities that you must be quite familiar with in order to become a pro at the game. Blitzcrank, in this case, has abilities and skills that are quite easy to understand but have quite a strong skill curve as almost all of them are skill shots. Since he isn’t extremely reliable, he is not picked often in Competitive games.
However, if you do end up understand how his skills work, he can be absolutely devastating to play against.
Passive: Mana Barrier:
Description: Gains a shield that absorbs 104 damage (30% Mana) for 10 seconds upon falling below 35% Health.
Cooldown: 80s
Blitz’s shield is completely dependent on his maximum mana. The more mana you have, the better your passive. Any item that provides him with more mana whether a Manaflow Band rune or Zejke’s Convergence, you’ll end up benefiting a lot from it. With these runes and items, you end getting a lot of mana in the early game.
This means that your passive is very strong especially from the early to mid-game. In the late game, it depends mostly on the amount of burst you are putting out at any particular point.
The passive itself is quite good to bait enemies as it has them wasting their abilities or also makes them go all-in for kills when they generally cannot kill you. Make sure to always have this passive up before you engage in a team fight. Since you will be on the front line, you will eventually have your HP go below 35% at any point. Therefore, it is extremely beneficial for you to keep a note of it.
You can also check the ability’s passive symbol and its cooldown on the bottom middle of the screen as well.
Rocket Grab:
Description: Fire his right hand to deal 80 magic damage (80 + 80 Magic damage) and pull the target to Blitzcrank.
Mana: 100
Level 1: 20-second cooldown, 80 base damage
Level 2: 19-second cooldown, 140 base damage
Level 3: 18-second cooldown, 200 base damage
Level 4: 17-second cooldown, 260 base damage
This is Blitzcrank’s most iconic ability and perhaps his defining one. This ability is by far the best hook in the game! If you end up landing it, there’s a high chance that you’ll either be killing the enemy you hook or putting them severely out of position.
We talk about positioning and how Blitzcrank can intimidate his enemy simply because he is one of the only champions in the game who relies mainly on intimidating and scaring the enemy with the threat of being taken out of position rather than succeeding to do so every single time. Sometimes, not even attempting a hook but rather keeping the threat alive can be extremely powerful.
Do note that you can start hooking your opponent as soon as you hook them and they are in range. The ult will proc only after the hook’s entire animation is complete. In essence, this means that opponents cannot move out of your range for about 0.5 seconds completely disrupting whatever combination you had in mind allowing you to stun the enemy with the Power Fist Auto. However, you should not always be Ulting especially when the enemy has no natural way to escape.
If your team is good at positioning and your opponent team isn’t very mobile; there’s a high chance they’ll end up using a Flash by trying to escape. Therefore, if it’s a high-priority target, then you should try keeping them in range before they can move away. However, if it isn’t, there’s a high chance they will get stunned chained by the rest of your time.
Your hook will always land on the first enemy it hits. However, this also means that they can hit a neutral objective or a minion. In those cases, your hook will still work but some units might not end up taking damage. If an enemy is CC immune, they will still end up taking damage but will not be pulled towards you. The ability does not provide you with any vision if it ends up hitting.
One particular tip about your hook is that you should never be hooking tanks, especially in team fights. The main reason for this is because tanks generally want to be in the center of team fights as they have AoE abilities that let them inflict massive damage or control the entire opponent team if they are positioned well. Therefore, unless and until you are absolutely sure you can CC a tank for a long enough time, you should not be pulling them.
As you get to higher elos, there’s a high chance that your hook won’t be as effective as it was before. This is due to a number of reasons. Firstly, most competitive teams will start understanding your hook’s animation time and will effectively dodge and weave out of it. So, every time you miss a hook, you will be punished for it. Second, everyone will know exactly what the counters of a hook are. There’s a high chance they might end up baiting your spell and will then keep a mental note of its cooldown and do whatever they please till your cooldown is back up again.
Overdrive:
Description: Gain 70% decaying Movement Speed and 30% Attack Speed for 4 seconds. When Overdrive ends, Blitzcrank is slowed by 30% for 1 second.
Mana: 75
Level 1: 13-second cooldown, 70% movement speed and 30% attack speed
Level 2: 12-second cooldown, 75% movement speed and 40% attack speed
Level 3: 11-second cooldown, 80% movement speed and 50% attack speed
Level 4: 10-second cooldown, 85% movement speed and 60% attack speed
Overdrive is quite a peculiar ability. At first, it provides you with quite a decent movement speed. But, as soon as it ends you are slowed quite a bit. Therefore, this ability is not quite useful for ganking as there is a high chance you will end up getting slowed by the end of your gank. Here are some particular things you can use this ability for that end up being extremely useful:
- Your main kit is designed to land your hook. As such, mobility on a hero like Blitz can feel overpowered at some points which is absolutely true. The main purpose of this ability is to position yourself in a manner taking advantage of your movement speed that you hook enemies from off-angles. That is why the slow exists for this ability. If you end up missing your hook, you pay the price of being close to enemy carries whilst being slowed too. If you do end up landing the hook, you will be on the offensive. So, the slow won’t matter as much.
- Before level 5, the Attack Speed that you gain from the ability isn’t very useful as your overall damage doesn’t really add up to fights neither do you build items that add to your damage in the first place. After you hit level 5, this ability becomes quite decent.
- You can use Overdrive to safely close gaps or run away from places that pose imminent danger.
- One extremely popular way to use Overdrive is to use it after your hook. After you hook and use your ultimate, if the enemy still is able to escape due to whatever reason; you can mow them down pretty quickly and get to them which can be quite useful against peskier heroes.
- Your hook slow is also affected by tenacity stacks.
Power Fist:
Description: Empowers his next attack to critically strike for 105 physical damage (180% Attack Damage) and knock up the target.
Mana: 25
Level 1: 10-second cooldown, 180% critical hit damage
Level 2: 9-second cooldown, 200% critical hit damage
Level 3: 8-second cooldown, 220% critical hit damage
Level 4: 7-second cooldown, 240% critical hit damage
The ability helps increase your auto attack range for a few seconds. The extra attack range also stacks with Rapid Firecannon. However, this is definitely an item that you should not be building on the champion under most circumstances. The auto-attack also stacks your ultimate’s passive and affects towers as well.
Since the ability does not consume a lot of mana, you can easily spam this skill in the lane. We recommend powering the ability up when your hook is active. This means that as soon as you hook a target, you can stun them to keep them in place. Moreover, this also instantly procs your Static Field passive on them.
If you are on the lookout to increase your burst even further, then we recommend sneaking in an auto after you hook and then using your Power Fist. Since you get a better range from this ability, you can hit enemies even when they are trying to run away. This means that you basically get in a free attack while also dealing the entirety of your kit’s damage.
Static Field:
Description: While Static Field is off cooldown, attacks mark enemies to deal 40 Magic damage (40+15% Magic Damage) after 1 second. (Passive)
Deals 250 magic damage (250+80% Magic Damage) to nearby enemies and silences them for 1 second. (Active)
Mana: 100
Level 1: 60-second cooldown, 40 passive damage, 200 active damage
Level 2: 40-second cooldown, 80 passive damage, 325 active damage
Level 3: 20-second cooldown, 120 passive damage, 450 active damage
Your Static Field is a great AOE spell that helps you secure kills in lane. Moreover, it also has a great silence that can completely dismantle early game combos. Your full combo after you get your ultimate does a high amount of damage especially early on. You can use it to secure tons of kills. If you end up catching a target that you think is of high priority, remember to use all your burst skills!
Do not try to kill steal with this ability. Rather, you should either use it to secure kills or set up a good kill for your carry. In the end, you are a supporting tank and your job isn’t to get kills. In the late game, the cooldown of this spell is quite low which means you can spam it quite consistently.
When it comes to his passive, it is quite unique. As long as the ultimate isn’t on cooldown, you will be dealing more damage on every auto-attack. Once you do end up attacking, your enemy is marked and the mark is consumed after 1 second to deal bonus magic damage. The mark will only be detonating after a second regardless of your attack speed.
The passive is also wonderful wave clear as you don’t have any inherent ability that helps you shove lanes. The ability also works on towers which means you can be quite a lethal pusher in certain scenarios.
Combos and Spell Usage:
As a Blitzcrank, your general combos are extremely situational and depend on what particular stage of the game you are in. Therefore, there isn’t a particular combo meant for the champion as it can vary for each stage of the game. However, not to worry, we’ll be talking about all the combos that you can use easily in all stages of the game.
But, for now, your main draw is your hook. As mentioned earlier, it serves two purposes. Firstly, to pull your enemies and secondly to intimidate your enemies into staying away from wherever you are in the fear of being hooked. As such, your spell usage should rely on only using a hook when you know you can secure the kill. It should not be used for harassing whatsoever at any stage of the game as it is your best deterrent.
In most scenarios, we recommend using your hook, getting an auto attack in, then using your ultimate, stunning the target and then finishing them off with your power fist’s increased damage. This serves as your basic combo for most stages of the game and if used properly should solo kill most squishy heroes whether they are carries or not. As you move on further, there are more intricate spells you can use in certain situations that can absolutely change the tide of the battle.
However, do note that this is considered an extremely basic way to play Blitz. You can only get better at the champion by practicing and you can start practicing the champion right now and improving by looking at the best possible way to play Wild Rift on PC.
Blitzcrank Skill Progression:
No champion in the game should ever follow a linear skill progression path. However, there is always a general guide available for you so that you can understand what abilities make the most sense in the early parts of the game.
Do note that you should definitely have an idea of why you are leveling those particular skills and nothing else as they can help you understand your power spikes much better in the long run.
- Rocket Grab: 1, 4, 6, 7
- Power Fist: 2, 12, 14, 15
- Overdrive: 3, 8, 10, 11
- Static Field: Whenever available
How to play Blitzcrank in all Stages of the Game:
Blitzcrank is an entirely skill-shot-based champion. However, even if you aren’t the best at hooking, the champion still isn’t completely worthless and there’s a lot you can do in lane regardless of your ability to land clutch hooks or not. As such, here’s how you can be impactful in all stages of the game as a Blitzcrank.
Early Game:

Out of all the supports in the game, Blitzcrank has probably the highest power spikes at levels 1 and 2. If you end up landing your hook, it means that the enemy will either die from the tower or use your summoners. Over time, this can lead to considerable advantages in a short amount of time. This is why there are generally snowball-y builds for the champion due to his inherent nature.
The more the number of hooks you end up hitting, the higher the chance that the enemy will need to switch lanes or even completely abandon it in certain situations. Your first ability, Rocket Grab works on jungle camps as well so it can be used to delay the enemy jungler’s farm tremendously.
Put up an award in the enemy’s Buff Monster found near your lane and then wait for the jungler to start killing the monster. As soon as they do so, hook the buff monster. As soon as you hit level 2, try to land a Rocket Grab, Power Fist combo. As mentioned earlier, you are extremely strong in the early game. As such, an early combo can easily take off a nice chunk of the enemy’s HP. If you end up landing one again, there’s a high chance that whoever you hooked ends up dying.
We do not recommend constantly spamming your hook as you might miss out on kill opportunities by doing so. You should wait for the enemy to go aggressive on you. If the enemy is playing it safe and is generally behind their minions, you can surprise them by walking up to them with Overdrive and then using your Power Fist. After you have gotten close and the enemy is knocked back, you can finish it off with a Rocket Grab to further CC the enemy.
If you are teamed up with a strong laner like Jhin or Xayah, you should probably be clearing out the lane as quickly as possible and should focus on ganking as your ADC should be able to sustain himself alone in the lane.
In general, laning as Blitz is all about understanding the enemy’s movements and positions and catching them off-guard. Unless and until you do not end up using your hook, your opponents will always be on edge. You should try hooking as much as you can while also remaining accurate to strike fear in your enemy’s hearts.
As you play the champion further, you’ll learn how to read your enemies like a book. Then, you can use the power of vision and evasive hooks to completely get to them securing your team an easy victory in most cases. If you see enemies playing passively because of you. Capitalize! Take complete control of the lane and do not let them get a single last hit until they try contesting you in a more aggressive manner.
To sum it up, your goal in the early game is to catch any enemy champion in the game off guard and to get as many kills as you can while try to scale as support. Currently, you are the strongest champion in the meta in terms of the early game supporting. So, take full advantage of it!
Mid and Late Game:
Once you get to the Mid and Late game, you can easily start making plays for your team by using your maxed-out Rocket Grab and Power Fist combination. However, as you enter the mid and late game, make sure that you are not doing this solo and that you have a teammate to back you up.
Since you are considered as active support who roams, it is okay for you to leave your ADC to farm solo unless and until their lane is being absolutely thrashed. However, even if the lane is in an unfavorable spot, there is not much you can do with Blitzcrank and therefore you should try to alleviate the pressure by making plays on the opposite side of the map.
If you find an enemy who is alone, we recommend not hesitating with your spell usage or worrying about mana. Instead, you should be quick and use your Overdrive then a Power Fist with a Rocket Grab combo just like you would do in the early game. If the enemy ends up initiating, use Static Field to instantly dismantle their initiations.
General Tips for Playing Blitzcrank:
After you’ve understood how you can lane, what particular spells you should be most familiar with and how you can be a nuisance to the enemy team, here are some general tips you should take advantage of to take your gameplay to the absolute next level.
A Winning Team:
If your team is winning, Blitzcrank can easily turn it into a true stomp. By denying gold, limiting areas, warding objectives, you can surely change the tides of battle towards your favor.
If you have reached the point where your team can burst down tanks easily, you should not always hook them. Why? Well, because in most cases, teams tend to use all their ultimates and skills on the one person that has been hooked. This is especially common in solo matches. While this does not seem disadvantageous, it can actually be disastrous if the enemy team rushes in and cleans you up since your entire team has run out of juice. Such situations can lead to your team coming back.
Therefore, we still recommend playing it slow and keeping your hook for enemies who you know can be burst down easily without the need of all of your teammate's abilities. Of course, if the situation demands it, hooking a Tank is not the worst thing in the world.
Understanding Vision:
Since you are a tank who has perhaps the highest HP in the game in most cases, you can be an absolute nuisance by turning into a living ward that can scout out the enemy maps. Doing so helps reduce the potential of someone trying to gank your team. As your opponents cannot one-shot you due to your immense health, you can get out of most situations.
If you feel like you are really out of position, you can easily use Overdrive to quickly get out. This turns you into quite a mobile tank allowing you to place wards and scout the map. Make sure to place wards in places where enemies generally frequent as you need to be able to see enemies before you hook them.
However, when you engage in a more aggressive playstyle, make sure to have your team’s back with you or else you might end up feeding for no apparent reason as your team will try to run in to try and save you.
Teamfighting:
As a Blitzcrank, your entire premise is to make sure that the fight always starts off as a 4v5 even before the enemy team can cast their spells. Try to always hook an enemy target that is a high priority before they can even react to get an easy clean kill.
Doing this in a few fights back-to-back can instill great pressure on the enemy making them second guess their decisions in most scenarios. Other than that, your job is the same as any other tank in the game. Try to soak up damage, CC enemies, apply some auto attacks and ult the most people you can. Your silence should be more enough in a lot of cases to completely disrupt the enemy team’s composition.
A Losing Team:
It can be quite hard to play Blitzcrank if you aren’t stomping. Since you have a lower amount of gold, there’s a high chance that you won’t have a lot of impact in team fights either. But, your crowd control still remains quite relevant and so does your tanky nature. You can still soak up quite a lot of damage for your team which can help you get back into the team.
You can be kited quite quickly. So, make sure to use your spells more sparingly. Try to stick to your teammates as you are the only deterrent against ganks from assassins. Try to keep lanes shoved towards the enemy’s side. Since you have a great wave clear from your ultimate’s passive, you should be able to do so quite freely. Try to understand what particular lanes are not possible to farm for your ADC so that you can shove them without impacting their farm.
Since players start getting aggressive as soon as they are in the lead, there’s a high chance you can hook a squishy assassin or support granting your team an easy kill which you can then further cement by getting an objective or two. While this may be hard, Blitzcrank is one of those supports who can help you come back into the game no matter how rough it might seem.
Helping your Allies:
As a tank, one of your integral duties is to ensure that your teammates do not end up dying from ganks by Assassins. However, all assassins on either side rely heavily on the vision provided to them by their team in the forms of ganks or general scouting or wards so that they can initiate on the opposing ADC.
If you are tanky support like Blitzcrank, you can consistently follow assassins around and make their life a living hell by never leaving their tail. If you end up spotting their rotations, you will be safe in most scenarios. Since their ganks will be expected and you will have spells saved up for them, they might turn into easy kills.
Blitz is powerful against assassins since he can actually punish them if they are caught off guard or have overextended. Make sure that you bait out the enemy assassin’s dash or wait for it before you hook as they can just jump onto your ADC and kill. Make sure to use your ultimate as often as you can and do not save it for last hits as you are a support.
Since you have a powerful silence, do not be afraid to use it as it is perhaps one of the best abilities in the game. It can be used to break combos and to cancel abilities as well. By silencing threats that jump on your ADC at the right moment, you should be able to win most games quite easily.
Blitzcrank Pros and Cons:

Every champion in the game has certain advantages and disadvantages that help you understand whether the champion is right for you or not. As mentioned earlier, most of Blitzcrank’s strengths and weaknesses are completely reliant on your own personal skill.
Pros:
Blitzcrank is a champion that enables your team and lets you maintain a stomp. Moreover, he is perhaps the only support in the game who can punish positioning to an extreme level. He is quite good in the lane and can be considered a lane bully. His burst damage is immense for a support tank and is quite strong at all stages of the game with adequate scaling.
Due to his hook, he never really falls off at any point whether the early or the late game. And, if you can start landing his hooks, he is actually an extremely fun champion to play and can also be recommended to new players who are quite adept with his mechanics.
Cons:
When it comes to cons, perhaps Blitzcrank’s biggest weakness is his reliance on just his hook. Without it, he can easily be kited and caught off guard. Moreover, it gets harder to play the higher elo the match is since players start predicting your abilities. He has no real poke and is, therefore, less tanky than most average tanks. Plus, he also lacks mobility which can make it quite hard to change mobile heroes and assassins in some instances.
Matchups:
Matchups are a great indicator of when you should be picking a particular champion and when you shouldn’t. In most cases, Blitzcrank goes extremely with most marksmen but there are some that he synergizes with extremely well.
Synergies:
Blitzcrank synergizes with almost every champion that has an inherent stun or a root. However, these characters can take massive advantage off of his hook and can even help him land it in some instances.
Jinx: Jinx and Blitzcrank are quite an annoying combo to deal with. The constant stunning and rooting makes it very easy for Blitzcrank to land a hook. In most cases, whoever lands their ability first enables you to land a CC chain which leads to a free kill. Jinx has tons of slows and roots which can make your life much easier in the lane.
Ashe: Ashe has three slows in her kit with stun as her ultimate. If someone has been slowed, they are quite an easy hook target. As such, you can couple your kit with a good Ashe player to easily dominate the lane CC chaining the enemy laners to death.

Miss Fortune: Miss Fortune is perhaps one of the best champions to play with as a Blitz. Her powerful burst ultimate means that anyone who is hooked will surely be visiting spawn in a couple of seconds.
Counters:
While Blitzcrank is quite a versatile pick, there are some particular champions that can absolutely negate his kit and can make it very hard for him to derive impact in the game.
Braum: If you have been hooked as a Braum, you can use your Dash Ability (Stand By Me) to easily get back to his team. However, in most cases, you will actually appreciate the hook as it can easily lead to a 3-4 man knockup. You can easily disrupt the fight with your ultimate and can also easily block the hook from ever reaching your ADC which makes a Blitz’s life extremely hard.
Alistar: You can start your ultimate in the middle of being hooked and all of Blitz’s damage will immediately be negated. In most cases, you actually will appreciate being hooked as an Alistar. You can headbutt right into his team which lets you set up an easy kill on the ADC turning the tide of battle.
Olaf: It is not possible for you to hook an Olaf that has triggered his ultimate. Plus, Blitz has no real save against Olaf if he starts targeting his ADC making him feel quite useless in certain situations.
Skins:
Skins are cosmetic enhancements for each champion in Wild Rift. They do not make any difference in gameplay and are purely meant for fluff. We’re going to be talking about the price and rarity of all the skins currently available for Blitzcrank in Wild Rift.
iBlitzcrank Blitzcrank:
Rarity: Epic
Price: 990 Wild Core
How to get iBlitzcrank: Buy it in the store
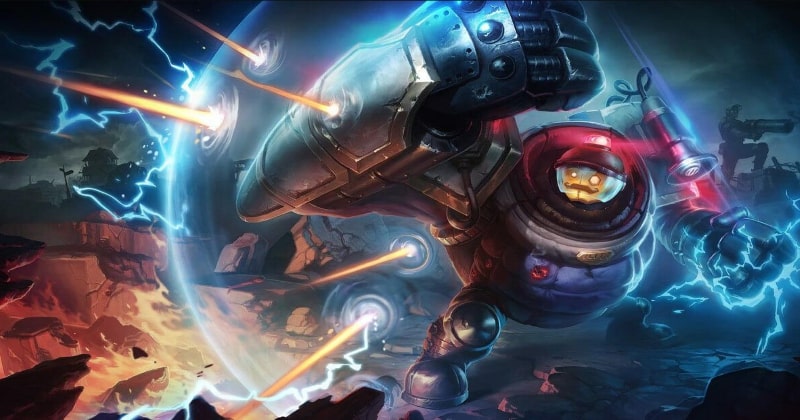
Battle Boss Blitzcrank:
Rarity: Epic
Price: 990 Wild Core
How to get Battle Boss Blitzcrank: Buy it in the store
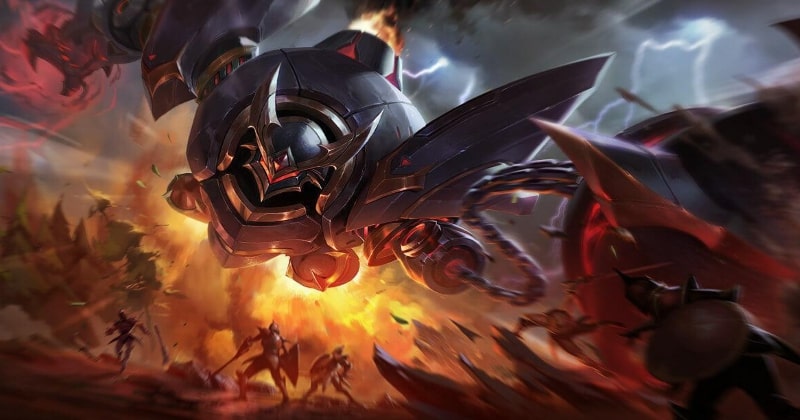
Boom Boom Blitzcrank:
Rarity: Epic
Price: 990 Wild Core
How to get Boom Boom Blitzcrank: Buy it in the store
LDPlayer Features for Wild Rift:
Learning how to land skill shots on a mobile phone can be extremely hard. Even if you practice, there’s a high chance you might end up missing due to the sheer small size of your device. Thankfully, there’s a very easy solution you can employ that can help you become better at Blitzcrank or Wild Rift in General for that matter.
You can use LDPlayer which is arguably the best Android Emulator out there for both applications and games. It has tons of features that you can take advantage of to take your gameplay to the next level and to provide you with an actual competitive edge.
For example, when you are up playing a hero like Blitzcrank, there’s a high chance that your controls might feel clunky on your phone. Not to worry. By using LDPlayer, you can easily change your binds to completely match the same control scheme you would find on the normal base PC version of the game providing you with a significant competitive edge. You can also set up dedicated controls. If you don’t know how-to, here’s how you can use key mapping to your advantage and destroy opponents in League of Legends: Wild Rift.
As you rank up at the game, you will notice a lot of places where you won’t be able to pull off your skills on time due to the sheer reaction speed of the enemy lineup. In order to avoid being overthrown, use LDPlayer’s Macro Feature! It lets you record a specific set of actions which you can then use at any particular time by using the bind assigned to it. This, in turn, helps you keep up with elusive heroes as you’ll only have to worry about your positioning.
Conclusion:
Blitzcrank is extremely popular support due to his tanky nature and fun skill-shot-reliant abilities. He has a good skill ceiling and can be played in tons of different elos. Have you enjoyed the guide? Is there something we have missed? Let us know in the comments section down below! If you haven’t played the champion already, make sure to do so as he is quite strong in the current meta.


What's New
TSX by Astronize Economy Guide – Tokens and Earning
Legend of Eterna Beginner Guide with Tips – The Adventure against the Dark Lord
Tokyo Debunker Tier List and Reroll Guide – Selecting Your Best Characters in April 2024
Olympics Go! Paris 2024 Tips and Tricks - Compete to the Best with a Beginner's Guide
If you're intrigued by this game and eager to dive in, simply click the button below to start playing this game online right in your browser!