A Guide on Shapeshifting in Dragalia Lost and How to Maximize it using buffs and Afflictions
2021-08-08
Today we will talk in detail about Dragon Shapeshifting Mechanism in detail which is an Ultimate ability in Dragalia Lost, a beloved action-adventure RPG by Nintendo games.
This guide is composed of two main sections. In the first section, we have talked in detail about the intricacies of Shapeshifting and what are the factors that accommodate it towards the most powerful Boost in the game, along with what are the benefits and how to avoid mistakes.
In the later section, we discuss the accompanying mechanics and buffs that can either debilitate the enemy or can hamper your progress by not allowing you to go into Dragon form.
This guide can be read along with the Complete Team-Building Guide as Dragon Shapeshift is a major mechanic of team-building, and as this guide was too big to be included as a part of that guide, so we have separated the two. For more information on Dragalia Lost and its other mechanics, read our Full list of guides.
Content:
Shapeshifting Explained:
“Humans and dragons: pact bound once more.”
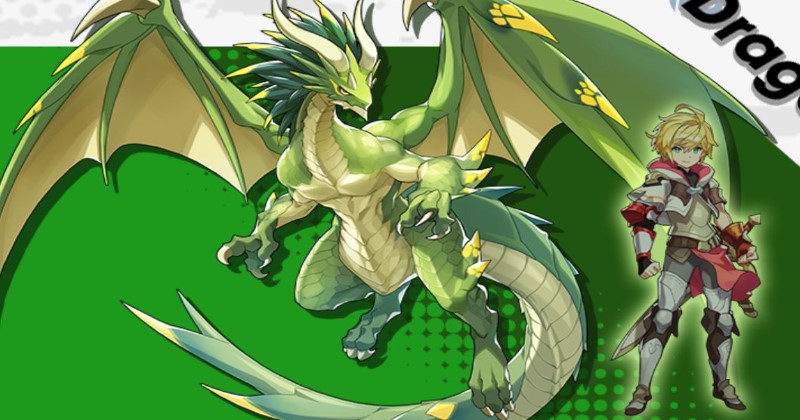
Shapeshifting is a mechanic that allows Heroes to transform into their geared Dragon during a mission.
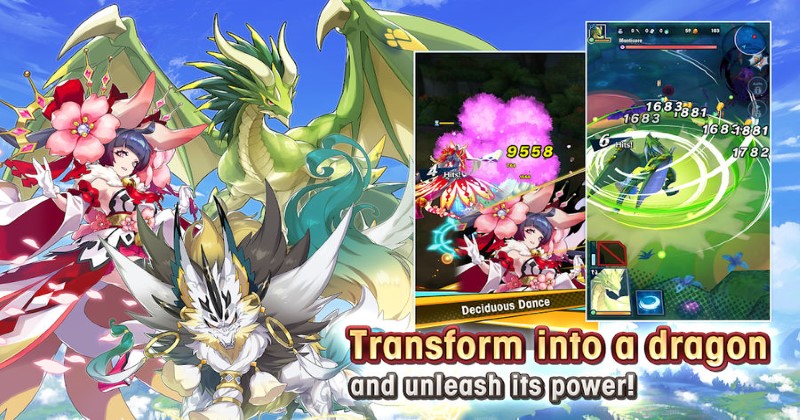
Dragon Guage – During a mission, an icon of the geared Dragon and a two-part Dragon Gauge will appear next to the Hero's icon. When this gauge is filled to at least 1 bar's worth (50%), the Dragon's icon will light up, and shapeshifting will be available for use.
- Suppose the gauge is filled to two bars' worth (100%), allowing two shapeshifting uses even if no further dragon gauge gains are received later. Note that this does not extend the duration of the shapeshift; shapeshift always uses 1 bar's worth of Dragon Gauge and has a fixed duration dependent on the Dragon's bond level and Dragon Time boosts.
- Shifting will be unavailable if the Hero has an affliction until the affliction wears off or is cleansed.
Benefits of Shapeshifting – This mechanic allows you to for some time fight as the Dragon. Shapeshift grants you access to new basic ATKs, a new skill (that is immediately ready to use), procs any dragon-related abilities. The Shapeshift also removes most debuffs, and a dragon timer shows how much longer the Hero will remain in their shapeshifted form.
- The basic ATKs of dragons will not refill the SP of the base Hero's skills, weapon skills, or shared skills. However, any automatic SP regeneration for those skills will still occur while in dragon form.
- All dragons have a limit on how many times they can use their skill within a single transformation. Usually, the limit is just 1, but if the limit is 2, the Dragon can recharge their skill with SP from their basic ATKs. Examples of dragons that can do this are Pop-Star Siren or Gala Mars.
The player cannot be knocked back during shapeshift and is immune to all afflictions and most de-buffs. Any DMG taken will deplete part of the dragon timer rather than HP. Once the timer is fully depleted, whether by time or by taking DMG, the Dragon will revert to the Hero, and shapeshifting will be unavailable for 10 seconds (even if enough dragon gauge remains to shapeshift again).
Blue Shields – All manner of shapeshift ATKs will break enemy blue shields instantly and can also destroy some field obstacles. They, however, cannot instantly break Kai Yan's Adamantine Shield unless a dispel effect is carried by the ATK (e.g., any dragon's basic ATKs with The Prince's Dragon's Dominance).
Unlike Heros, both moving and dodging during shapeshifting will also cause hit stun towards targets and break objects.
Animation Locking – When using a dragon's skill, their animation is locked - even if the Dragon receives enough DMG during the skill to end dragon form, the Dragon will not revert until the skill animation has finished under most circumstances. You could use animation Locking to "dragon tank" ATKs that would otherwise be lethal to the Hero if the Dragon were to revert too early.
Note that there exist some ATKs that will still instantly revert the Hero, either unconditionally or if the Dragon isn't mid-skill iframes, and cause an effect or DMG. These ATKs will pop a Shapeshift Disrupted notification on top of the Hero upon a forced ejection.
AI Auto-shapeshift – Computer-controlled allies will not shapeshift if it is available. Lead units will shapeshift if the Auto-shapeshift feature is turned on during auto-play. The Dragon will immediately use their skill and start their combo chain once the skill animation ends.
Shapeshift Shockwave:
When a Hero shapeshifts, they will emit a shockwave that DMGs surrounding enemies, with an element that matches the geared Dragon. The DMG modifier of this Shockwave depends on the rarity of the geared Dragon, with some exceptions.
Heros with unique dragon forms or access to Unique Transformations will use the 5* variant of the Shockwave, regardless of what their geared Dragon's rarity is. The element of their Shockwave will match the Hero, also regardless of the geared Dragon.
|
Dragon Rarity |
DMG Multiplier |
|
5* |
200% |
|
4* |
150% |
|
3* |
100% |
Dragon Gauge:
The dragon gauge dictates whether or not shapeshifting is available. At least a 50% charge is needed for a single shapeshift; it is possible to store up to 100% charge before further Dragon Gauge gains are lost. The Dragon Gauge can hold a maximum of 1000 DP (Dragon Points). Dragon gauge charge is granted:
- Whenever an enemy is defeated
- When a boss's HP reaches certain thresholds (usually every 10% of their max HP depleted)
- When breaking a dragon obelisk (250 DP from a small obelisk, 500 DP from a large obelisk)
- When a personal gauge boosting skill or ability is activated in the player's team (but not across other players in a co-op mission).
Notes:
- It is impossible to receive dragon gauge charge while shapeshifted from defeating enemies or reducing a boss's HP. However, personal gauge boosts and dragon obelisks will still provide a dragon gauge charge.
- In solo play, this gauge is shared among all units.
- In co-op play, the gauge is shared to the extent that all players get the charge from enemy kills/boss HP thresholds/dragon obelisks. However, the actual amount of gauge gained can differ based on each player's geared Dragon Haste co-abilities and chain co-abilities, if any. Personal gauge boosts from skills and abilities also do not apply to human-controlled co-op allies at all.
- If a computer-controlled ally is brought into the co-op, they will share gauge with the human player that they belong to of a particular team.
Gauge Boost – Certain conditions need to be met to activate the gauge faster. The increase of the Dragon Points speed directly is linked with your Dragon Haste, while it is much faster for unique Shapeshift Heroes.
Gauge Boost while in Co-op:
This boost will apply to all units in co-op mode, typically reserved for Shapeshift Prep at the start of the combat, while applying to all 16 Heroes when playing Raids. You can use Dragon Gauge Charge Up abilities to increase the speed. These are affected by Dragon Haste, though. Specific skills can increase this effect and are applied when one of your heroes has that ability and uses them. Note: These abilities also apply when you have them geared on your main Hero and use them while adventuring. A few of these abilities are as follows:
Ancient Tempest (Humanoid Midgardsormr) – Deals 1 hit of 1863% wind DMG to enemies in a line and raises the dragon gauge by 35 DP if the ATK connects.
Blazing Circlet (The Prince) – Deals 2 hits of 826% flame DMG to surrounding enemies, raises the dragon gauge by 30 DP if the ATK connects, and inflicts burn for 12 seconds - dealing 88.3% flame DMG every 3.9 seconds - with 110% base chance.
Estate Brillante (Summer Chelle) – Restores HP to the user with 30% Recovery Potency, resets the ravishing radiance gauge, and fills the dragon gauge by 80 DP. Abilities that increase the dragon gauge fill rate will not affect this increase.
Some abilities increase the Dragon Gauge, which you can use yourself when battling.
Draconic Charge III (Gala Prince) – Fills 50% of the user's dragon gauge when their HP drops to 40% (once per mission). You can get to use this ability if your primary control is Gala Prince.
(Shadow) Strength & Shapeshift Prep III – If the user is tuned to Shadow: increases strength by 50% and fills 30% of the dragon gauge at the start of missions. You can get this ability when you have the Ramiel Dragon.
Skills = Shapeshift Prep II (Forte) – Fills the user's dragon gauge by 4% when using skills. This filling up does not include weapon or dragon skills. Skill is also not affected by Dragon Haste.
Dragon Haste:
One of the main factors that can increase gauge speed fills up, and that's why Prince is a prime Hero for most of the game until the end-game. Plus, while playing co-op, the Dragon Haste that you have is only applied to you and won't be to your human allies, while in a single-player, every team member gets the benefit.
Holywyrm’s Advent and Blossoms on the Water's Edge are two Wyrmprints with this ability that can apply Dragon Haste to you. Here, Reduced DEF & Enhanced Shapeshifting III increases the dragon gauge fill rate by 8%.
Dragon Haste ability and its multiple levels, if geared by certain Heroes, will share the Haste with other Heroes while in co-op. A few of these Heroes are:
- Marth
- Naveed
- The Prince
- Gala Ranzal
- Gala Alex
- Halloween Odetta
Draconic Resurrection:
A mechanic that allows the user to use the Dragon Points to revive you is not counted towards the amount you are allowed while missioning. DR is available once per Hero in year team but is only available to the Hero you have geared a DR on.
Draconic Resurrection – If the user's HP falls to zero while 50% or more of the dragon gauge is filled, this ability consumes 50% of the dragon gauge. It revives the user with 50% of the dragon gauge after five seconds of their maximum HP (once per mission). DR revive does not consume any of the revives provided for a given mission.
Wyrmprints with this ability are Beneath the Boughs (Staff's Boon), Beneath the Boughs (Wolf's Boon).
Shapeshift Mode Effects:
Some certain powers and abilities can only apply when you are in the Shapeshift or Dragon form and will cease as soon as you are back to normal.
DMG:
Quite simply, as this is an Ultimate ability, the DMG will soar instead when in standard form. Certain factors can increase this DMG, like Dragon DMG Up which increases the DMG dealt while in dragon form. Following are some abilities that can provide you with Dragon DMG up if you have the associated Heroes or Wyrmprints.
Reduced DEF & Enhanced Shapeshifting III (Holywyrm's Advent) – Decreases the user's DEF by 15% but adds 18% to the modifier applied to DMG when in dragon form extends shapeshift time by 15%, and increases dragon gauge fill rate by 8%.
Windwyrm's Nature II (Humanoid Midgardsormr) – When shapeshifting, the user will transform into Midgardsormr regardless of what Dragon they are geared with when the mission begins. It also adds 18% to the modifier applied to DMG when in dragon form.
Draconic Dream II (Halloween Mym) – Increases DEF while shapeshifted by 100%. When the "Dream Boost" effect is active, it adds 20% to the modifier applied to DMG when in dragon form.
Gala Prince also provides this boost from the Shapeshifting Boost ability.
Shapeshift AA Speed and Crit:
This stat increases the AA speed while in Shapeshift form. Following are some abilities and skills that provide you with this boost.
Flamewyrm's Nature (Gala Mym) – Reduces susceptibility to burning by 100%. When shapeshifting for the first time, Mym will transform into Brunhilda regardless of what Dragon she is geared with, and she will be granted the "Draconic Power" effect for the remainder of the mission, which will increase her strength by 15% and power up the Flames of Passion skill. The second time onwards, she will transform into High Brunhilda instead, and her ATK rate while shapeshifted will increase by 15%.
Flamewyrm's Sweet Nature (Halloween Mym) – Reduces susceptibility to burning by 100%. When shapeshifting, Mym will transform into Brunhilda regardless of what Dragon she is geared with, and her ATK rate while shapeshifted will increase by 15%.
Dragonlight's Resolve (Gala Prince) – Reduces dragon gauge depletion over time by 40% and increases ATK rate when shapeshifted by 10%.
Other than DMG, particular abilities like Cursed Blood can increase the Crit rate while in Dragon form.
Cursed Blood (Audric) – In dragon form, it increases the critical rate by 30% but reduces DEF by 30%.
Affliction Bonuses and Dispel:
Lathana’s ability, The Faceless God, makes her ATKs deal more DMG when in Shapeshift if the enemy is poisoned.
The Faceless God – When shapeshifting, Lathna will transform into Nyarlathotep regardless of what Dragon she is geared with. Grants an HP regen buff healing for 14% Max HP every 3.9 seconds for 20 seconds each time she shapeshifts. It also increases DMG to poisoned enemies by 15% when not shapeshifted. When shapeshifted, it increases DMG to poisoned enemies by 215% instead, and both her regular ATKs and skill in dragon form are stronger.
While some abilities dispel enemy buffs when you ATK when in Shapeshift form.
Dragon's Dominance (The Prince) – Increases player EXP intake for clearing missions by 15%. This ability does not stack with other similar abilities; the highest value will be applied. Normal ATKs, when in dragon form, will dispel one enemy buff.
Dragon's Fierce Rule (Alberius) – Grants the user's ATKs the ability to dispel one enemy buff when in dragon form. This effect does not apply to the DMG dealt with as the user shapeshifts.
DEF and Shapeshift Duration:
Following are some abilities that increase the DEF when in Shapeshift form. One is Draconic Dream which can be used if you have Halloween Mym as one of your Heroes, while the other is Shapeshift Prep & Dragon DEF, which you get from Alberius.

Shapeshift Prep & Dragon DEF (Alberius) – Fills 25% of the dragon gauge at the start of missions and increases DEF by 25% when in dragon form.
The time you can stay in the Shapeshift form is known as Dragon Time which you can extend by increasing the bond level from the one you have geared at the moment, while some skills can also give that effect.
Dragon Time (Dragon Brethren WP) – Extends shapeshift time by 20%. Following are some dragons with this ability:
- High Brunhilda
- High Mercury
- High Midgardsormr
- High Jupiter
- High Zodiark
Shapeshifting Boost (Gala Prince) – Adds 10% to the modifier applied to DMG in dragon form and extends shapeshift time by 20%. Benefits your whole team.
Flame Dancer (Panther) – If a team member is attuned to Flame: extends their shapeshift time by 20%. Benefits your whole team.
Reduced DEF & Enhanced Shapeshifting and Dragon Time are two abilities that will extend the shapeshift time when you are playing with your main Hero. While Shapeshifting Boost, the ability you get from Gala Prince, increases your time when with Gala Prince and use it as co-ability. Dragonlight’s Resolve is one of the abilities you get from Gala Prince that can slow down the decay of Shapeshifting.
Pancake Paradise – Abilities like Pancake Paradise restores your depleting Shapeshift Gauge, which you get from Nimis Dragon. Restores HP to the user with 40% Recovery Potency, raises the dragon gauge by 20%, and extends shapeshift time by 5 seconds. Shapeshift time cannot exceed the maximum permitted time.
Shapeshift Carry-over Effects:
Some skills or abilities will trigger an effect upon shapeshifting, and their effects will persist after shapeshift has ended.
Enhanced Skills:
These skills give you an enhanced boost after returning to your usual self after the Shapeshift and can last until that particular mission is over.
Aquatic Ruin (Humanoid Mercury) – Deals 6 hits of 290% water DMG to enemies directly ahead and grants the user a Strength Amp (Team Amp MAX Lv. = 2, Duration Extension = 15 sec). If the user has already shapeshifted at least once, you will use a more powerful version of this skill.
Enhanced Version: This variant deals 9 hits of 290% water DMG to enemies directly ahead and grants the user a Strength Amp (Team Amp MAX Lv. = 2, Duration Extension = 15 sec).
Breath of the Yuletide – Deals one hit of 889% wind DMG to enemies directly ahead and raises the dragon gauge by 90 DP if the ATK connects.
Enhanced Version: After the user has shapeshifted once, this skill will raise the dragon gauge by 130 DP instead.
Flames of Passion (Gala Mym) – Deals 4 hits of 517.5% flame DMG to enemies in a line. Enhancement: If the user has already shapeshifted at least once and has the "Draconic Power" effect, it will deal with 4 hits of 622% flame DMG instead.
HP Regen and Others:
Particular abilities like Faceless god from Lathna, grants HP regen when shapeshifting, which persists up to 20 sec. Such abilities can persist beyond shapeshift due to their timer or if the shapeshift is ended quickly.
Dragon's Claws (The Prince, Xainfried, etc.) – Each shapeshift increases strength for the remainder of the mission (up to three times per mission). At first, shapeshift strength is increased by 6% in total. Second, shapeshift strength is increased by 15% in total. On the third, shapeshift strength is increased by 30% in total.
Dragon's Claw persists till the end of the mission, starting upon your first shapeshift.
Shadow-Strength & Dragon's Might (Chthonius) – If the user is tuned to Shadow: it increases strength by 52% and increases strength by a further 10% for the remainder of the mission upon shapeshifting, up to twice per mission.
Same with the above skill as was the case with Dragon’s Claw.
Dragon's Skill (The Red Impulse) – Each shapeshifts increases ATK skill DMG by 8% (up to three times per mission). Dragon's skill grants one or more buffs to Skill DMG that last throughout the mission.
Dragon's Scales (Guardian of the Bond) – Each shapeshifts increases DEF for the remainder of the mission (up to three times per mission). On the first shapeshift, DEF is increased by 10%, while on the second shapeshift, DEF is increased by 21%. Finally, the third shapeshift, DEF is increased by 33% in total. Dragon's Scales grants one or more buffs to DEF that last throughout the mission.
HP Increased – Same as HP; some skills will increase your max HP of Shapeshift form till the end of the mission. Remember that this stat is passive and won't show on you as other buffs and bonuses show with an icon. The skill, in this case, is Steeled Dragon's Endurance.
Shadow-Steeled Dragon's Endurance – If the user is tuned to Shadow: increases max HP by 30% for the remainder of the mission upon shapeshifting for the second time.
Specific skills are triggered when your Shapeshift form is finished or just before it is finished, which have specific conditions to proc, which we will discuss with individual skills of this kind just below.
Atlantean Flood – Deals one hit of 534% and the other hit of 1246% water DMG to the target and nearby enemies. If the user is targeting an enemy and not using a skill when their remaining shapeshift time runs out, this skill will be used automatically, regardless of whether or not the skill gauge is filled.
The condition for this skill is not using any skill when the Shapeshift is finishing.
Blazing Strike – Deals 1 hit of 1078% and one hit of 1470% flame DMG to enemies directly ahead, and inflicts scorchrend for 21 seconds - dealing 41.6% DMG every 2.9 seconds - with 120% chance. Enemies in break state take one hit of 808.5% and 1102.5% flame DMG instead.
The condition for this skill to trigger is; If the user is targeting an enemy and not using a skill when their remaining shapeshift time runs out, this skill will be used automatically, regardless of whether or not the skill gauge is filled.
Doomsday Eclipse – Deals 8 hits of 300% shadow DMG to the target and nearby enemies. Enemies in break state take 8 hits of 225% shadow DMG instead.
Holy Crusade – Deals 5 hits of 297% light DMG to enemies directly ahead and increases the user's max HP by 8%.
The condition for this skill to trigger by itself is the same as the above three.
Unique Dragon Form:
There are certain Heroes that, when shapeshift, retain their particular Dragon skills and ATKs regardless of the geared Dragons; only the abilities of the geared Dragon are carried into the shapeshift form.
|
Hero |
Unique Dragon |
|
Chelle |
Cat Sìth |
|
Gala Chelle |
Cat Sìth |
|
Summer Chelle |
Summer Cat Sìth |
|
Humanoid Mercury |
Mercury |
|
Humanoid Midgardsormr |
Midgardsormr |
|
Lathna |
Nyarlathotep |
|
Gala Leonidas |
Mars |
|
Mega Man |
Rush |
|
Halloween Mym |
Brunhilda |
|
Gala Mym |
Brunhilda |
Resplendent Scion (Chelle) – When shapeshifting, the user will transform into Cat Sìth regardless of what Dragon they are geared with. When they're shapeshift is undone, the user will become inspired. (Might: 100)

The Faceless God (Lathna) – When shapeshifting, Lathna will transform into Nyarlathotep regardless of what Dragon she is geared with. Grants an HP regen buff healing for 14% Max HP every 3.9 seconds for 20 seconds each time she shapeshifts. It also increases DMG to poisoned enemies by 15% when not shapeshifted. When shapeshifted, it increases DMG to poisoned enemies by 215% instead, and both her regular ATKs and skill in dragon form are stronger. (Might: 120)
Stunning Summer Scion (Summer Chelle) – Grants the user a beautiful radiance gauge with three bars. The ravishing radiance gauge's effects are based on the number of bars filled.
One bar: Increases the user's chances of inflicting flash burn by 30%.
Two bars: Increases the user's chances of inflicting flash burn by 50% and increases the DMG dealt by the Sole Estivo skill by 100%.
Three bars Reduce the user's movement speed by 50%.
Also, when shapeshifting, you will reset the ravishing radiance gauge, and the user will transform into Summer Cat Sìth regardless of what Dragon they are geared with. Using Sole Estivo will grant the user a DEF amp with a maximum team amp level of two. (Might: 100)

LS Reactor (Mega Man) – Boosts DMG dealt with boss enemies in "Mega Man: Chaos Protocol" missions by 30%. When shapeshifting, Mega Man will jump onto Rush regardless of what Dragon he is geared with. (Might: 200)
Unique Shapeshift Transformation:
Most things and mechanics are the same as in Regular Shapeshift, from filling, Shockwave, decay, and affliction restrictions. The first different thing is the re-transformation button. You can return to the normal Hero state whenever you desire. The gauge will remain at the amount whence you deactivated and will start filling from the same amount. Once you deactivate, you can not transform back for at least 5 seconds but can do so afterward, provided your gauge is filled.
If the UT gauge fully depletes and is not ended prematurely, the wait time will be 10 seconds instead. UT does not consume the regular Dragon Gauge, so if an ally in solo play activates UT, then the shared Dragon Gauge will not be affected by other units on the team. UT is also unique to the unit itself, meaning multiple units on a team can activate UT without preventing other units from doing so.
UT Gauge – The Gauge fill of UT is the same as the regular one but UT can hold higher amounts of DP, thus requiring more amount of DP to fill up.
UT has its unique mechanics from the regular Shapeshifts, which is why they appeal to some.
Dragon Drive, Mechanic 1 – this does not transform them as in Shapeshift, but when activated, your Hero gets enhanced stats and DMG. During the animation of the Dragondrive, the Hero is immune to Afflictions, and getting afflictions when in Dragondrive doesn't end it.
Following are some of the abilities that grant you Dragondrive. All of the following skills Give the user a dragon drive gauge and change the shapeshift button into a dragon drive button. Tapping this button activates their Dragondrive.
Renegade Queen – During Dragondrive, the skill will change the user's standard ATKs and force strikes, DMG will be increased as the user's HP decreases, and standard ATKs and force strikes will fill the user's dragon drive gauge. While Dragondrive is active, the user's skill DMG will be increased by 35%, and DEF will be increased by 75%.
Wyrmbound – During Dragondrive, standard ATKs will fill the user's dragon drive gauge, the user's skill DMG will be increased by 30%, and DEF will be increased by 50%.
Abyssal Dragon – During Dragondrive, the user's skill DMG will be increased by 35%, and their skill gauges will fill 30% faster.
Summer Conqueror – Dragondrive grants the following effects; First, the user's force strikes are changed and have three increasingly powerful charge levels. Second, movement is possible while charging but at a slower movement speed. Third, the user's strength is increased by 50%.
Hybrid Shapshifts:
Some Heros can perform a Hybrid Transformation with different characteristics from normal Shapeshifting. These forms can be considered a hybrid of regular Shapeshifting and Dragondrive.
Similarities to Shapeshifting:
- Instantly breaks enemy blue shields, causes stagger to smaller enemies, and automatically breaks obstacles.
- Knockback immunity.
- While transformed, the Hero is immune to all afflictions and most de-buffs.
- The Hero may participate in Dragon Battles in their transformed form.
- Force Strike and Shared Skills are disabled.
Similarities to Dragondrive:
- Heros retain an HP stat, and reaching 0 HP will cause them to be defeated instead of exiting the transformed form.
- The transformation is NOT affected by most dragon-related abilities such as Dragon's Claws, Dragon DMG, etc. Only Shapeshift Prep and Dragon Haste will work.
- You can manually end the transformed form early by pressing the transformation icon again.
Upon activating a Hybrid Transformation, the adventurer's human form skill gauges will be saved and be replaced by their Hybrid Transformation skills, which start out completely filled. When Hybrid Transformation is ended, the adventurer's human form skill gauges will return to their state before the transformation happened.
Hybrid Transformation Abilities:
Dragon Scion – Replaces the dragon gauge with a Divine Dragon gauge that holds a max of 1,800 points. Tapping the gauge after it has filled to at least 560 points will allow Tiki to transform into her Divine Dragon form. By tapping the gauge a second time or after the gauge has been consumed, Tiki's transformation will end. Damage taken will be reduced by 50% when in Divine Dragon form.
Metamorphosis – Grants Notte a unique shapeshift called "Metamorphosis" and replaces the dragon gauge with a metamorphosis gauge that holds a max of 1,800 points. Tapping the gauge after it has filled to at least 560 points will allow Notte to shapeshift, and when shapeshifting, Notte will use Metamorphosis to transform regardless of what dragon she is equipped with. By tapping the gauge a second time or after the gauge has been consumed, Notte will return to her original form.
Persona 5:
Adventurers from the Persona 5 Strikers: Caged Desire collaboration can summon a Persona instead of shapeshifting. The Persona will fight alongside the user, and the user's skills are powered up.

Summoning a Persona has similarities to Shapeshift, and Dragondrive are as follows;
Similarities to Shapeshifting:
- While a Persona is summoned, adventurers' standard attacks do NOT instantly break enemy blue shields or obstacles, but the summoned Persona's attacks do.
- While a Persona is summoned, adventurers' native skills do break enemy blue shields instantly, but only the parts of the skill that the Persona performs. For instance: in Joker's skill Wild Rush, Arsene only participates by dashing at the end; therefore, only that last hit may break enemy blue shields instantly.
- The adventurer may participate in Dragon Battles with their Persona summoned.
Similarities to Dragondrive:
- Adventurers retain an HP stat, and reaching 0 HP will cause them to be defeated instead of dismissing the Persona.
- Summoning a Persona is NOT affected by the majority of dragon-related abilities such as Dragon's Claws, Dragon Damage, etc. Only Shapeshift Prep and Dragon Haste will work.
- The Persona can be manually dismissed early by pressing the Persona icon again.
- Force Strike and Shared Skills are still available to use while the Persona is present.
- During the summoning animation, the adventurer is immune to all afflictions.
- The adventurer does NOT gain immunity to afflictions or debuffs while their Persona is summoned. If they are afflicted while their Persona is summoned, the Persona is not forcibly dismissed.
- The Persona gauge holds a maximum of 3,000 points, meaning that any regular Dragon gauge boosts will be only about 33% as effective, percentage-wise.
Different adventurers will have different ways of filling their Persona gauges. For more details, refer to their respective adventurers' page.
Computer-controlled allies will summon their Personas once at least one of their native skills is ready.
|
Name |
Might Value |
Adventurers |
Wyrmprints |
Dragons |
Weapons |
|
Dancing Panther I |
80 |
Panther |
- |
- |
- |
|
Dancing Panther II |
100 |
Panther |
- |
- |
- |
|
Will of Rebellion I |
80 |
Joker |
- |
- |
- |
|
Will of Rebellion II |
100 |
Joker |
- |
- |
- |
|
Guiding Feline I |
80 |
Mona |
- |
- |
- |
|
Guiding Feline II |
100 |
Mona |
- |
- |
- |
|
Humanity's Companion I |
80 |
Sophie |
- |
- |
- |
|
Humanity's Companion II |
100 |
Sophie |
- |
- |
- |
Dancing Panther – Grants the Persona element Fire to certain attacks. Also grants the user a Persona gauge and changes the shapeshift button into a Persona button. Tapping this button summons Carmen. While summoned, Carmen will attack together with the user. Additionally, increases defense by 6% and grants the user a unique force strike.
Will of Rebellion – Grants the Persona element Curse to certain attacks. Also grants the user a Persona gauge and changes the shapeshift button into a Persona button. Tapping this button summons Arsène. While summoned, Arsène will attack together with the user. Additionally, increases defense by 6% and grants the user a unique force strike that has two charge levels. At level two, it dispels one enemy buff and partially fills the Persona gauge if the attack connects.
Guiding Feline II – Grants the Persona element Wind to certain attacks. Also, rants the user a Persona gauge and changes the shapeshift button into a Persona button. Tapping this button summons Zorro. While summoned, Zorro will attack and restore HP to all teammates as the user attacks.
Additionally, grants the user a unique force strike that activates the "Beast Eye" effect for 30 seconds. Beast Eye increases the user's Persona gauge fill rate by 20% while active but is removed when Zorro is summoned and cannot be granted while Zorro is active.
While Zorro is not summoned, standard attacks and force strikes will fill the Persona gauge.
Afflictions:
Afflictions are the things that can cause you the problem when you are in the battles. Afflictions are temporary debilitating states inflicted by ATKs or traps within a mission. You cannot shapeshift or transform to become a dragon. Removes all Energy level stacks and prevents a Hero from gaining more energy level stacks. Removes all Inspiration level stacks and prevents a Hero from gaining more inspiration level stacks.

Affliction proc rates, DMG rates, and duration vary across Heros, enemies, skills, ATKs, and mission difficulty levels. In general, for an enemy of a specific difficulty, the ATKs and skills have varying proc rates but the same DMG, DMG rate, and duration.
Afflictions types and their Lists:
There are eight afflictions; poison, freeze, paralysis, curse, burn, bog, blind, stun. All of these have their different affection. The following table lists the afflictions in-game.
Each affliction is assigned to a group, which is used to determine behavior when the affliction is applied to a Hero:
- A Hero can only have one instance per affliction applied to them at a time.
- For example, a Hero can have at most one stack of Burn applied to them at a time. If they are Burned again, the affliction's timer will just reset.
- Additionally, a Hero can only have one affliction per group applied to them at a time. If a second affliction of the same group is applied, it will overwrite the first one.
- Example A: Blind and Curse are group 1 afflictions, so a Hero cannot simultaneously have both. If a Hero is Cursed and then Blinded, they will now only be Blinded.
- Example B: Burn is group 1 while stun is group 2, so a Hero can be both Burned and Stunned.
DoT Afflictions:
DMG-over-time (DoT) afflictions cannot deal with lethal DMG. If an affliction dealt lethal DMG, they would instead reduce the target's HP to 1. Afflictions will deal 0 DMG to targets with only 1 HP remaining.
Poison – Deals DMG to the afflicted enemy's HP every few seconds for a limited amount of time. When inflicted onto a Hero, it instead deals a percentage of the afflicted Hero's maximum HP.
Burn – Deals DMG to the afflicted enemy's HP every few seconds for a limited amount of time. When inflicted onto a Hero, it instead deals a percentage of the afflicted Hero's maximum HP.
Paralysis – Deals DMG to the afflicted enemy's HP and causes stagger every few seconds for a limited amount of time. When inflicted onto a Hero, it instead deals a percentage of the afflicted Hero's maximum HP and causes stagger every few seconds for a limited amount of time. Note: Automatically removed on bosses that enter break state.
Frostbite – Deals DMG to the afflicted enemy's HP every few seconds for a limited amount of time. When inflicted onto a Hero, it instead deals a percentage of the afflicted Hero's maximum HP.
Flash burn – Deals DMG to the afflicted enemy's HP every few seconds for a limited amount of time. When inflicted onto a Hero, it instead deals a percentage of the afflicted Hero's maximum HP.
Shadowblight – Deals DMG to the afflicted enemy's HP every few seconds for a limited amount of time. When inflicted onto a Hero, it instead deals a percentage of the afflicted Hero's maximum HP.
Stormlash – Deals DMG to the afflicted enemy's HP every few seconds for a limited amount of time. When inflicted onto a Hero, it instead deals a percentage of the afflicted Hero's maximum HP.
Scorchrend – Deals DMG to the afflicted enemy's HP every few seconds for a limited amount of time. When inflicted onto a Hero, it instead deals a percentage of the afflicted Hero's maximum HP.
Others:
Blindness – Causes ATKs to miss with a fixed chance for a limited amount of time. When inflicted onto an enemy, applies 50% chance to miss. When inflicted on a Hero, the chance to miss applied depends on the source of the affliction.
Curse – Stops SP gain and usage of skills and helper skills for a limited amount of time.
Bog – Comes under 2nd group, Movement speed is reduced by 50%, and DMG received is increased by 50% for a limited time.
Freeze – Comes under 2nd group and freezes Hero in a block of ice, preventing action and movement for a limited time. It can be removed by allies ATKing the block of ice.
(Note: on lower graphics settings, the block of ice may not be visible, but the afflicted will look locked in place with their struck animation.)
Stun – Comes under 2nd group, locks a character in place, and prevents all action for a limited amount of time. After a brief period, it can be removed instantly if the afflicted Hero is ATKed.
Sleep – Locks a character in place and prevents all action for a limited amount of time. After a brief period, it can be removed instantly if the afflicted Hero is ATKed.
Stacking of Afflictions:
Afflictions applied to enemies will currently stack according to the following table:
|
Affliction |
DoT |
Blindness |
Bog |
Freeze |
Stun |
Sleep |
|
DoT |
Yes |
Yes |
Yes |
Yes |
Yes |
Yes |
|
Blindness |
Yes |
No |
Yes |
Yes |
Yes |
Yes |
|
Bog |
Yes |
Yes |
No |
Yes |
Yes |
Yes |
|
Freeze |
Yes |
Yes |
Yes |
No |
No |
No |
|
Stun |
Yes |
Yes |
Yes |
No |
No |
No |
|
Sleep |
Yes |
Yes |
Yes |
No |
No |
No |
Afflictions Calculations:
if Resistance% >= 100% : Affliction Chance% = 0.
if Resistance% < 100% : Affliction Chance% = (Proc Chance% - Resistance%).
When attempting to apply an affliction, RESIST text may appear, with color-coded meanings:
- White RESIST means the attempt to apply an affliction failed, but the boss does not 100% resist the affliction yet. In other words, just a failed attempt due to bad luck.
- Yellow RESIST means the boss 100% resists the affliction.
- Blue RESIST only appears when the player 100% resists a Void Battle effect, such as Dull, Enervation, or Scorching Air. Blue RESIST will never appear when the player tries to apply an affliction to a boss.
- Red RESIST means the boss cannot be afflicted by anything, as their resistance value is 999%. Any attempts to reduce the enemy's resistance with Resistance Down effects will fail. Such a RES is rare and notably appears during Berserk mode with some bosses in The Agito Uprising's Legend difficulty.
Most enemies increase their resistance to an affliction each time they are afflicted. The increased amount varies by the affliction type:
- DMG-over-time (DoT) afflictions: +5%
- Blindness: +10%
- Freeze, Stun, Bog, or Sleep: +20%
Both of these resists like tally and resists all players share increase in co-op.

Increasing Affliction Chances:
Affliction Chance Up increases the chance of inflicting a specific affliction.
Mechanics – Affliction chance is additive to the existing chance on a given action; for example, if a skill has a 120% base chance to apply poison, and 50% Poison chance up is applied, the chance will now be 170%. This value is then used in the Affliction Chance Formula. Please note that this can only increase the chance, not grant an affliction to actions that otherwise have no chance. For example, poison's chance up will increase poison if a skill can already apply poison. But it CANNOT add poison to a skill that is incapable of applying poison typically.
Affliction chance has a cap of 200%. At this value, an enemy with a current resistance of less than 100% is guaranteed to be afflicted. If the enemy has 100% resistance, the affliction will fail regardless of how high its chance is.
Affliction Resistance Down – decreases the foe's chance of resisting a specific affliction.
Typically, affliction RES is determined by the following formula:
FLOOR[(Base RES + Affliction Response RES), 100] - Res Down = Final Res
Here:
- Base Res - is the Res an enemy has at the start of the battle.
- Affliction Response Res - adds Res every time an affliction is successfully applied. For example, each successful application of poison will increase poison res by 5%. Final Res CANNOT exceed 100% through these increases.
- Res Down - resistance decrease as a result of an Affliction Res Down de-buff.
- Final Res - the resistance value used in the Affliction Chance Formula to determine whether an affliction is successful.
Example:
- Suppose we use Formal Noelle's Grim Missive (-20% poison res) on a foe with a Base Res value of 50% and an Affliction Response Res value of 45%. FLOOR[(50 + 45), 100] - 20 = 75, so the foe's Final Res will be set to 75%.
- If poison is attempted on the foe while the debuff is still active, the calculation will use the Final Res of 75% in determining whether the affliction is successful.
- If the affliction is successful, the Affliction Response Res will increase to 50%, which subsequently causes the Final Res to increase to 80%.
- If poison is attempted again, the Final Res will NOT increase because the first part of the formula has already hit the cap of 100 Res: FLOOR[(50 + 50), 100] - 20 = 80. The calculation effectively means that the Final Res value has been "capped" at 80% for the remaining time of the Poison Res Down de-buff.
- When the poison res down de-buff wears off, the enemy's Final Res value will go back up to 100%: FLOOR[(50 + 50), 100] - 0 = 100
Additional Notes:
- This reduction will have no effect if the enemy is in a state of 999% affliction resistance, indicated by red RESIST text. Such case notably appears in:
- The berserk mode in Legend Volk's Wrath
- The berserk mode in Legend Kai Yan's Wrath
- Summoning Circles in Jaldabaoth's Piercing Gale
- Walls of Miasma in Morsayati Reckoning
Affliction Guard – protects the user from becoming afflicted when hit up to a certain number of times.
- While this effect will block afflictions, it will NOT block the user from taking DMG.
- This effect also will NOT block de-buffs such as Strength Down or special effects such as Plague.
- Note that one stack of Affliction Guard will still be consumed if an affliction hits the user, they would have 100% resisted anyway.
- For example, Alex has 100% resistance to affliction. If she is hit by an ATK that could inflict Blind, the DMG will consume one stack of Affliction Guard. Consumption of a stack would essentially "waste" a stack of Affliction Guard that could have blocked an Affliction Paralysis-inducing ATK instead, which Alex does not resist.
- If a Shield or Life Shield successfully nullifies an ATK and its attached affliction, that ATK will NOT consume one stack of Affliction Guard, as there is no longer an affliction to block.
Factors affecting Afflictions:
Affliction Chance – The overall % chance to inflict the affliction.
Proc Chance – The base % chance to inflict the affliction of the skill in mission (can be found on Hero pages on relevant Skill tabs)
Resistance – The % level of immunity to the status effect (can be found on Enemies page for enemies, Heros have a base resistance of 0% to all afflictions). No enemies or Heros possess any resistance to de-buffs such as Bleeding, Strength Down, and DEF Down (excluding some Void-specific de-buffs, whose resistances can be obtained).
Affliction List for Bosses:
This page displays the Affliction Resistance chances for all Imperial Onslaught and Dragon Trials bosses.
- For now, story mode bosses are not included.
- The resistance of each boss does not change based on difficulty.
- The most vulnerable Affliction types are bolded for each boss.
- Bleed is not included.
Imperial Onslaught:
The vertical icons represent each boss by the element, while the horizontal icons represent the different afflictions.
|
|
Burn |
Stun |
Bog |
Freeze |
Sleep |
Blind |
Paralysis |
Curse |
Poison |
|
Fire |
55% |
55% |
10% |
10% |
30% |
30% |
30% |
30% |
30% |
|
Water |
30% |
10% |
55% |
55% |
30% |
30% |
30% |
10% |
30% |
|
Wind |
10% |
30% |
30% |
30% |
30% |
10% |
30% |
55% |
30% |
|
Light |
30% |
30% |
30% |
30% |
10% |
55% |
55% |
10% |
30% |
|
Shadow |
30% |
10% |
30% |
30% |
55% |
55% |
10% |
30% |
55% |
Dragon Trials:
The vertical icons represent each boss, while the horizontal icons represent the different afflictions.
|
Spheres |
Burn |
Stun |
Bog |
Freeze |
Sleep |
Blind |
Paralysis |
Curse |
Poison |
|
Flamewyrm's |
100% |
100% |
55% |
55% |
100% |
100% |
100% |
100% |
100% |
|
Waterwyrm's |
100% |
100% |
100% |
100% |
55% |
100% |
100% |
100% |
55% |
|
Windwyrm's |
55% |
100% |
100% |
100% |
100% |
100% |
100% |
100% |
100% |
|
Lightwyrm's |
100% |
100% |
100% |
100% |
100% |
55% |
100% |
55% |
100% |
|
Shadowwyrm's |
100% |
100% |
100% |
100% |
100% |
100% |
55% |
100% |
100% |
Cleansing Afflictions:
These are conditions that remove afflictions. Note that enemies that transition into overdrive mode will recover from all ailments.
|
Condition Name |
Description |
Related skill (s) |
|
Poison Relief |
Removes poison affliction. |
Spirited Song, Cleansing Dance, Refreshing Flare |
|
Burn Relief |
Removes burn affliction. |
The measure of Mercy, Healing Wave, Curative Catch |
|
Freeze Relief |
Removes freeze affliction. |
Dream Wedding |
|
Paralysis Relief |
Removes paralysis affliction. |
Elder Cure |
|
Blindness Relief |
Removes blindness affliction. |
Everlasting Summer |
|
Stun Relief |
Removes stun affliction. |
Lifeguard Lift, Blessings of Destiny, Naturopathy |
|
Curse Relief |
Removes curse affliction. |
Sweet Treat, Radiant Savior, Refreshing Flare |
|
Bog Relief |
Removes bog affliction. |
Winds, Heal Us! |
|
Sleep Relief |
Removes sleep affliction. |
Currently none. |
|
Frostbite Relief |
Removes frostbite affliction. |
Currently none. |
|
Flash burn Relief |
Removes flash burn affliction. |
Currently none. |
|
Shadowblight Relief |
Removes Shadowblight affliction. |
Currently none. |
|
Stormlash Relief |
Removes Stormlash affliction. |
Currently none. |
|
Scorchrend Relief |
Removes scorchrend affliction. |
Currently none. |
Cleansing Dance – Grants all teammates a one-use shield that nullifies DMG less than 20% of the user's HP (but does not stack with any other shields) and removes poison.
Curative Catch – Restores HP to all allies with 108% Recovery Potency, removes burning, and increases the entire team's strength by 15% for 60 seconds. This strength increase will not stack.
Dream Wedding – Restores HP to all allies with 108% Recovery Potency, removes freeze, and increases the entire team's strength by 15% for 60 seconds. This strength increase will not stack.
Elder Cure – Restores HP to all allies with 108% Recovery Potency, removes paralysis, and increases the entire team's strength by 15% for 60 seconds. This strength increase will not stack.
Everlasting Summer – Restores HP to all allies with 44% Recovery Potency, removes blindness, then continues healing for 15 seconds with 35% Recovery Potency every 2.9 seconds. It will also increase the entire team's strength by 8% for 60 seconds. This strength increase will not stack.
Lifeguard Lift – Increases the strength of water-attuned Heros in the team by 15% for 15 seconds and removes stun.
Refreshing Flare – Deals 7 hits of 260% light DMG to surrounding enemies, inflicts paralysis for 13 seconds - deals 88.3% DMG every 3.9 seconds - with 110% base chance, and removes curse and poison from all allies.
Winds, Heal Us! – Restores HP to all allies with 108% Recovery Potency, removes bog, and increases the entire team's strength by 15% for 60 seconds. This strength increase will not stack.
Buffs, De-buffs, and other Effects:
Buffs:
Offensive Buffs:
|
Condition |
Detail |
|
Strength Up |
Increases Hero's or enemy's strength. |
|
Strength Amp |
Increases Hero's strength through a tiering system. The effect will extend to teammates after leveling it up enough. |
|
ATK Rate Up |
Increases Hero's ATK speed. It affects basic ATKs, skill animations, and force strike animations (but not force strike charge animations). |
|
Combo Time Up |
Extends the window of time between hitting an enemy and the combo counter resetting. |
|
Dragon DMG Up |
Increases Hero's DMG while in dragon form. |
|
Dragon Haste Up |
Increases Hero's dragon gauge fill rate. |
|
Critical Rate Up |
Increases Hero's critical rate. |
|
Enhanced Crit |
Increases Hero's critical DMG. |
|
Enhanced Standard ATKs |
Increases Hero's standard ATK DMG or enhances standard ATK's effect. |
|
Force Strike DMG Up |
Increases Hero's force strike DMG or enhances force strike's effect. |
|
Force Strike Charge Rate Up |
Increases Hero's force strike charge rate. |
|
Force Strike ATK Rate Up |
Increases Hero's force strike ATK rate. |
|
Elemental DMG Up |
Increases the modifier applied to the elemental DMG of a specific element. |
|
Skill DMG Up |
Increases Hero's skill DMG or enhances skill's effect. |
|
Skill Upgrade - Effects |
Upgrades Hero's skill to apply specific infliction. See the specific affliction pages for related skills (e.g., blindness). |
|
Skill Haste Up |
Increases Hero's skill gauge fill rate. |
|
SP Regen |
Fills Hero's skill gauge by a certain amount every few seconds for the duration of the buff. |
|
Debuff Chance Up |
Increases the chance of inflicting de-buffs. |
|
Affliction Chance Up |
Increases the chance of inflicting a specific affliction. |
|
Affliction Punisher |
Increases DMG dealt with enemies suffering from a specific affliction. |
|
Class Banes |
Increases DMG dealt with enemies of a specific class. |
|
Buff Time Up |
Lengthens the duration of buffs cast by the user. |
Defensive Buffs:
HP Up – Increases the Hero's maximum HP and heals them for the amount of HP they just gained. HP buffs will cap at +30% maximum HP, after which only the HP recovery effect is granted.
DEF Up – Increases Hero's or enemy's DEF.
Shield – Creates a one-time-use shield for a target that nullifies DMG once up to a percentage of the caster's maximum HP. If more DMG is taken than the shield can withstand, the shield will fail, and you will take full DMG. For example: taking a 1,001-DMG hit with a shield that can withstand 1,000 DMG will cause the unit to receive 1,001 DMG, not 1 DMG.
If a shield nullifies a damaging ATK that would have dealt an affliction, the affliction will be nullified as well. If a non-damaging ATK deals with an affliction, the shield will not be consumed and will not nullify that affliction.
Life Shield – A variation of the regular shield that acts more like a second HP bar. Life Shields use a direct HP value instead of a percentage. More HP is added to this value every time this shield is stacked, up to a maximum based on a percentage of the caster's maximum HP. If more DMG is taken than the Life Shield can withstand, the Life Shield will nullify as much DMG as it can before the Hero takes DMG.
For example: taking a 1,001-DMG hit while having a Life Shield that can withstand 1,000 DMG will cause the unit to receive 1 DMG. Since the Hero still ultimately takes DMG, the shield will not nullify afflictions. If the Life Shield fully nullifies a damaging ATK that would have dealt an affliction, the affliction will also be nullified. If a non-damaging ATK deals an affliction, the Life Shield will not nullify that affliction.
Elemental Shield – Creates a target shield that nullifies the specific element's DMG once up to a percentage of the target's maximum HP.
DMG Reduction – Reduces DMG taken.
Elemental Res Up – Reduces DMG taken from a specific element.
Affliction Resistance – Reduces the chance to be inflicted with a specific affliction.
Recovery Potency Up – Increases Hero's recovery potency.
HP Regen – Heals a Hero or enemy for a certain amount every few seconds for the duration of the buff.
Life Steal – Heals a Hero by a percentage of the DMG they inflict.
Movement Speed Up – Increases Hero's movement speed.
De-buffs:
|
Condition |
Detail |
|
Strength Down |
Decreases Hero's or enemy's strength. |
|
Critical Rate Down |
Decreases Hero's critical rate. [1] |
|
Critical DMG Down |
Decreases Hero's critical DMG. [1] |
|
Force DMG Down |
Decreases Hero's force strike DMG. [2] |
|
Skill DMG Down |
Decreases Hero's skill DMG. |
|
Skill Suppression |
Decreases Hero's skill gauges by a certain amount every few seconds for the duration of the debuff. |
|
HP Down |
Decreases Hero's maximum HP. |
|
DEF Down |
Decreases Hero's or enemy's DEF. |
|
Elemental Res Down |
Increases DMG taken from a specific element. |
|
Recovery Potency Down |
Decreases Hero's recovery potency. [1] |
|
Affliction Resistance Down |
Decreases the enemy's resistance to a specific affliction. |
|
Creeping Corrosion |
Deals periodic DMG to a Hero over time, and unlike afflictions, it can deal with lethal DMG. It can be removed if the Hero receives enough healing. |
|
Curse of Nihility |
Nullifies most buffs on Heros and disables buff zones (see the page for more details). |
Special Effects:
Bleeding – A de-buff that causes DMG for 30 seconds every 4.99 seconds that can stack up to three times, increasing DMG by 50% with each stack. It cannot deal with lethal DMG.
Energy/Energized – "Energy" is a special kind of buff that upgrades specific skills once five energy levels have been accumulated. Once five energy levels have been accumulated, a Hero becomes "Energized." The skill will upgrade their next ATK skill/recovery skill to have 50% more skill DMG (additive with other sources of Skill DMG) or have 50% more Recovery Potency (additive with other sources of Recovery Potency).
Using a skill upgraded by energized resets the user's energy level and ends the energized state. Furthermore, becoming afflicted will also have the same effect.
For skills and abilities that are boosted by the number of buffs applied, unlike other buffs, energy counts count as one buff no matter how many times the user's energy levels are increased.
Skill Shift – Skill Shift is a system in which specific skills are upgraded when connecting with a foe.
When Skill Shift has activated once, the skill is said to be in "Phase II." If Skill Shift activates once more, it will then be in "Phase III." Not all skills have this many phases; however, the number of phases will depend on the individual skill.
Skill Shift resets when you successfully connect during the final phase, returning the skill to its original capabilities. Successfully connecting with the skill again after this will activate Skill Shift once more.

Mikoto's Ravenous Fire and Hanabusa's Dance of Blades are special skills that implement Skill Shift but have a time limit on their Skill Shifts.
Inspiration – "Inspiration" is a special kind of buff that upgrades certain skills once enough inspiration levels have been accumulated. Once a Hero reaches inspiration level five, they will become "inspired," and their next ATK skill will deal with critical DMG.
Being inspired only affects ATK skills and not any other skills (buffs, debuffs, etc.). Even if an ATK skill also has a buffing effect, the benefits of being inspired will only apply to the skill's DMG.
Using a skill upgraded by being inspired resets the user's inspiration level and ends the inspired state. Furthermore, becoming afflicted will also have the same effect.
Knockback Immunity – The user becomes unable to be knocked back or up by enemy ATKs.
If such an ATK hits the user, they will continue their current action as if ATK never hit them. However, they will still take full DMG.
Note that this buff may cause the user to take more DMG than usual. The lack of knockback can leave the user within an ATK's hitboxes for longer when they would typically get knocked out of range or get knocked up in the air, which grants complete invincibility after the first hit.
Dispel Strike – The user's next Force Strike will remove a buff from the enemy. If multiple buffs are present, the following order of priority is applied:
- Burning Ambition (from Nobunaga).
- The buff with the longest remaining duration.
- The oldest buff.
Style Shift – Style Shift is a system that alters the user's standard ATKs after a certain combo count.
It's used only by Heros that can switch between unique "Stances," like Valerio, Mitsuba, or Gala Leif.
Locked Sigil, Sigil Released – The Ilian Apostle Heros use Sigil: Nevin, Ryszarda, Faris, and Pinon. These Heros start missions with a de-buff called Locked Sigil, which manifests as 5 stacks of 60 seconds each (totaling 300 sec). The debuff will wear off over time but can also be accelerated by several seconds if the Hero performs specific actions. Once Locked Sigil has completely worn off, it will change into Sigil Released.
During Sigil Released, the Hero may have enhanced skills, standard ATKs, and/or abilities. The exact effects will vary by Hero. If the "Team Change" feature for the second phase of Rise of the Sinister Dominion is used, and a Sigil-using Hero is in the second team, they will automatically be granted Sigil released. This release will occur regardless of how long the first phase lasted.
Unique Conditions:
These are effects unique to certain skills and abilities on certain Heros and dragons. Let's see a few of them to get an understanding of the concept behind these special effects.
Heinwald:
Call of Chaos – Deals 2 hits of 541% shadow DMG to the target and nearby enemies and restores HP to all allies with 36% Recovery Potency. If the ATK connects, it restores an additional 3% of the DMG inflicted as HP to all allies. This recovery caps at 4% of the recipient's HP per hit.
When Abyssal Connection is active, this skill will restore an additional 9% of the DMG inflicted as HP to all allies instead, and this recovery caps at 8% of the recipient's HP per hit.
Abyssal Connection (Unique Condition) – Activates "Abyssal Connection" for 10 seconds. During Abyssal Connection, the user's strength increases by 10%, and the Call of Chaos skill is powered up. It also increases the strength of the user and nearby allies by 5% for 10 seconds.
Addis:
Bamboo Cutter – Deals 3 hits and one delayed hit of 255% wind DMG to enemies directly ahead and inflicts poison for 15 seconds - dealing 28% DMG every 2.9 seconds - with 100% base chance.
When "Bamboo Cutter Buffed" is active, instead of poison, this skill will inflict bleeding for 30 seconds - dealing 71% DMG every 4.9 seconds - with an 80% base chance.

Dignified Soul (Unique Condition) – Activates "Bamboo Cutter Buffed" for 10 seconds. Bamboo Cutter Buffed increases the user's strength by 20% and upgrades Bamboo Cutter's skill to inflict Bleeding instead of Poison.
Nobunaga:
Dream Offensive – Deals one hit of 647% flame DMG to enemies in a line and applies Burning Ambition to enemies with a 100% chance for 30 seconds. Enemies will take one hit of 1420% flame DMG when Burning Ambition's (Unique Condition) effect ends. Burning Ambition does not stack and cannot be reapplied to enemies still affected by it. Burning Ambition will be triggered if dispelled. Burning Ambition may deal lethal DMG.
Conclusion:
Dragalia Lost has become a powerhouse in the Gacha gaming scene and has constantly rolled out new content with Heroes, and as such, the game has now become its own Encyclopedia, and therefore, guides like this have become a necessity. We hope that you have found all the information you need in this guide to help you progress.